Origami Blinking Eye
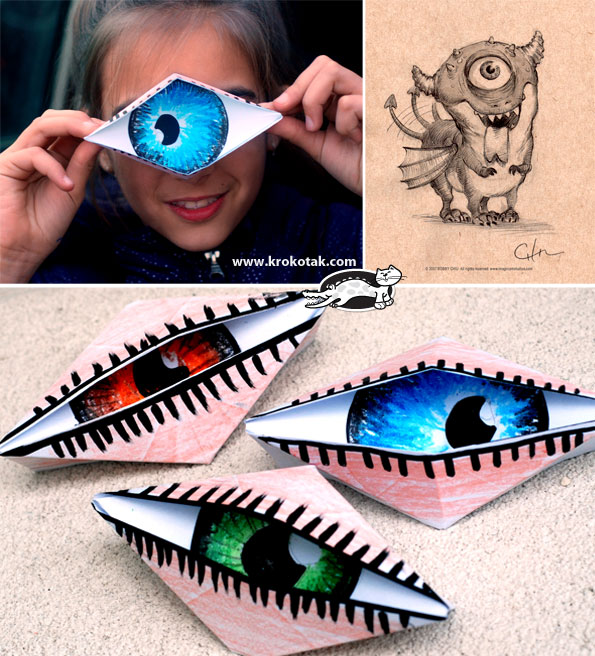
Follow the steps below to create an origami blinking eye. Practice the folding with the smaller paper provided. Once you feel confident with the folding, begin your final eye on the larger paper
1. Begin with a square piece of paper. Follow steps 1 - 3 (See the visual steps below).
1. Begin with a square piece of paper. Follow steps 1 - 3 (See the visual steps below).
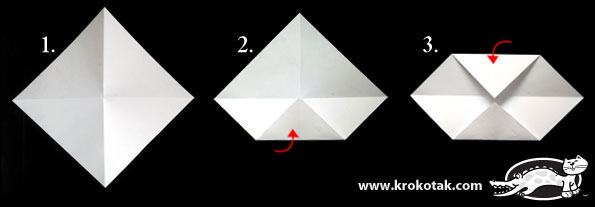
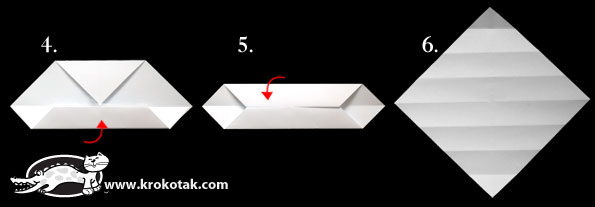
2. Next complete steps 4 - 6. Step 6 is opening all of the folds to show the square.
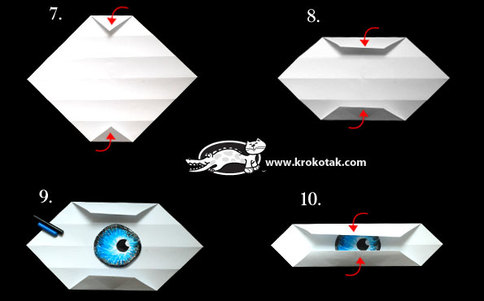
3. Follow steps 7 - 10. You will draw the eye in step 9. Notice its placement on the folded paper.
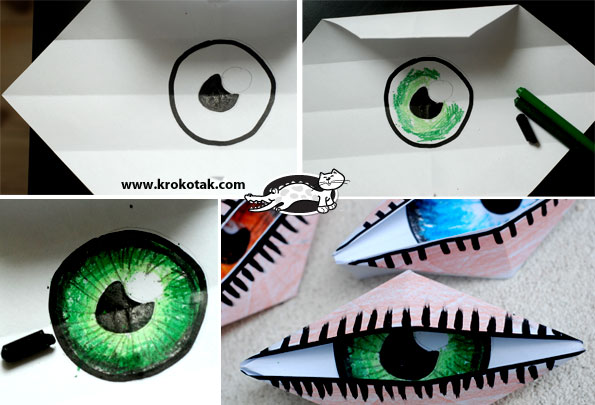
4. Coloring in the eye - The eye will be colored in colored pencil. It should include several colors and marks to make it as realistic as possible. Be sure and leave white paper showing for the highlight in the eye. You may draw your own eye, someone else's eye, an animal eye, or a monster eye. Below are some websites to help you with your eye.
Realistic Eye Drawing
Drawing the Human Eye
http://www.orginal-ayakkabilar.com/video/Tzl60TotoS8/drawing-a-realistic-eye-using-colored-pencils.html
Realistic Eye Drawing
Drawing the Human Eye
http://www.orginal-ayakkabilar.com/video/Tzl60TotoS8/drawing-a-realistic-eye-using-colored-pencils.html
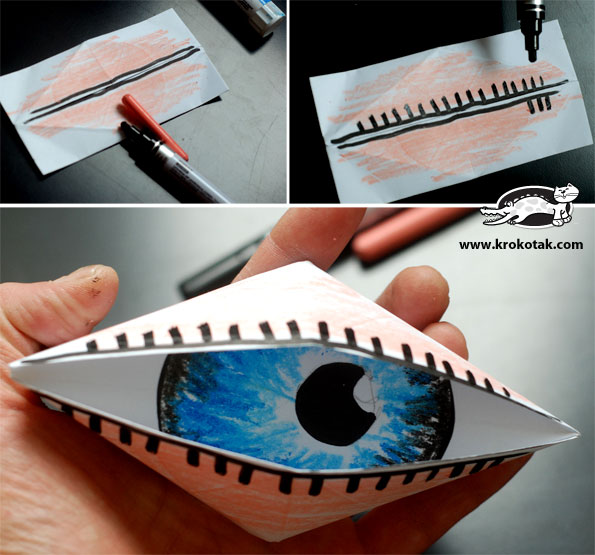
Color the eye lid. The color should be based on the eye you used. If it is a human eye, the skin color should match the skin color of its owner. You may need to mix several colors together to create the exact color of the skin. If it is an animal or a monster, choose a color that fits with that creature. Draw on the eyelashes or cut them out of cardboard. Color the cardboard lashes with black Sharpie and glue them on.
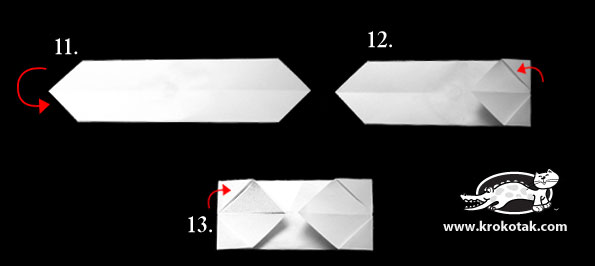
5. Continue with steps 11 -13. Step 11 is to simply turn over step 10 so you are viewing the back.
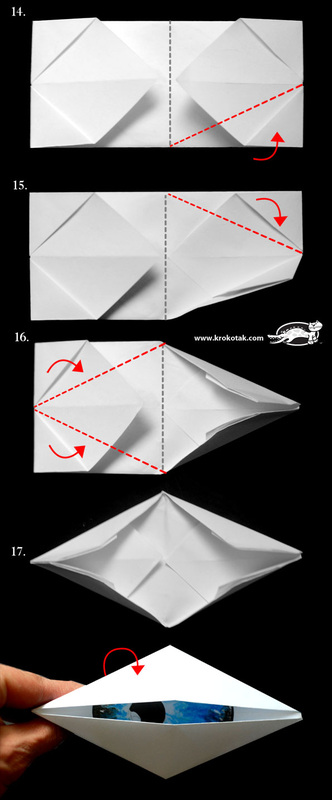
6. Steps 14 - 17 are a bit tricky. Pay close attention to the directions. The black dotted line down the center of the paper represents the vertical center axis. It is to show the center of the paper. You will need to find the center of your paper since it will not have this line. Do not create a fold there. If you must draw it on, be very light so it can be erased later. There is already a fold on the horizontal axis. Be aware of these two markers. They are used a lot in these folding steps. Once the folds are complete, flip the paper again. Pulling both ends opens and closes the eye.
Reflection
Fill out the self-assessment and turn it in to Schoology.
Fill out the self-assessment and turn it in to Schoology.
