Copper Repousse
HUNTER LUND - JCHS Student
When you have completed your art piece, take a photo of your finished and turn it in to Canvas
http://juliasanderl.com/page/4/
Metal Repousse
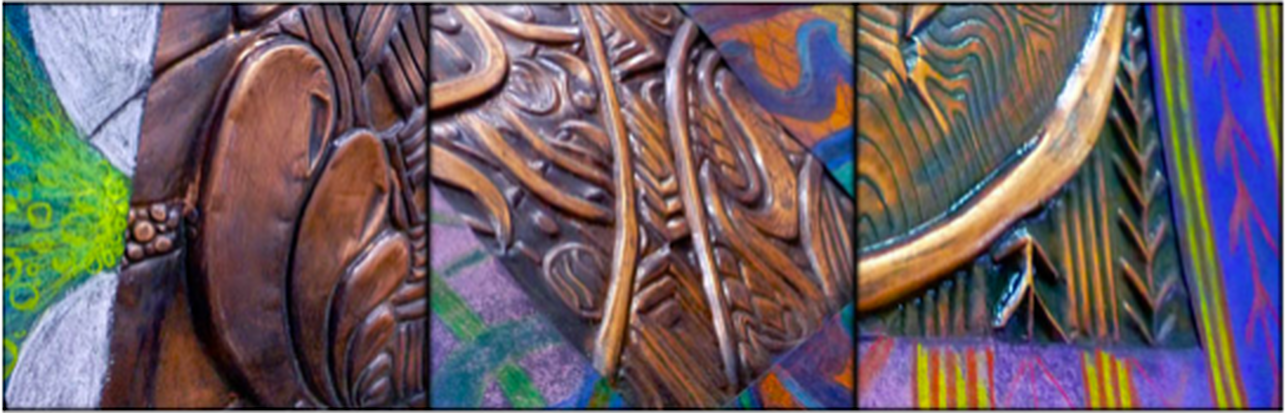
Repoussé, method of decorating metals in which parts of the design are raised in relief from the back or the inside of the article by means of hammers and punches; definition and detail can then be added from the front by chasing or engraving. The name repoussé is derived from the French pousser, “to push forward.” This ancient technique, which has been used extensively throughout the history of metalworking, achieved widespread popularity in Europe during the 16th, 17th, and 18th centuries. (http://www.britannica.com/art/repousse) Another name used for this technique is called tooling.
Tea pots and tea services, coffee pots, vases, metal plates and decorative chargers, pendants, buckles, bangles, and other decorative objects have for centuries been made using the repousse technique. A craftsman working in repousse stamps a design into a soft metal, like gold, silver, or copper from the back of the work piece. The craftsman uses a variety of tool shapes and sizes, and special hammers. The workpiece is embedded in a hard wax to facilitate efficient energy transfer of the hammer blows to the metal. After the repousse design is imparted to the work, the front side may be chased or engraved to enhance the design. (https://oleklejbzon.com/repousse-chasing.html)
Repousse is an ancient form of art that can be found in Early Greek and Roman art through today. It was used to decorate metal items, in jewelry, and for weapons and armor. The first great advance in metalworking occurred when techniques for making bronze sculpture were developed
during the Bronze Age. Brass, an alloy of copper with zinc, came into use later (see brasses, monumental; brasses, ornamental). The Iron Age provided a cheaper medium used chiefly for tools and ornamental ironwork until modern times, when improved methods, alloys, and machinery made iron available and essential to the industrial and structural trades. (http://www.1upinfo.com/encyclopedia/M/metalwor.html)
Generating Ideas
Begin by brainstorming ideas for your Zentangle. Make a list of patterns and colors that you could include. Think about colors that work well together.
Researching
Watch the PPT (YOU MUST WATCH THIS BEFORE YOU BEGIN)
View Websites
http://mercartsmetalembossing.blogspot.com
https://www.zentangle.com
http://tanglepatterns.com/zentangles/what-is-a-zentangle
http://www.tangletangletangle.typepad.com
Watch Videos
http://mercartsmetalembossing.blogspot.com
https://www.zentangle.com
http://tanglepatterns.com/zentangles/what-is-a-zentangle
http://www.tangletangletangle.typepad.com
Watch Videos
Visual Design
3 Quick Sketches
Draw 3 patterns that you could possibly use for your Zentangle. You do not need to fill in any areas, just draw out some ideas in pencil. Remember these sketches are for trying patterns. They are not intended to be finished, detailed drawings.
Zentangle Test Pattern
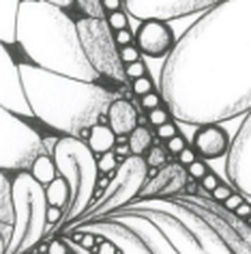
Below is part of a Zentangle pattern. Recreate the design and values using a Sharpie marker. Use a pencil to add shading. Take a photograph and upload it to Schoology.
3 Quick Sketches
Draw 3 patterns that you could possibly use for your Zentangle. You do not need to fill in any areas, just draw out some ideas in pencil. Remember these sketches are for trying patterns. They are not intended to be finished, detailed drawings.
Zentangle Test Pattern
Below is part of a Zentangle pattern. Recreate the design and values using a Sharpie marker. Use a pencil to add shading. Take a photograph and upload it to Schoology.
Final Design
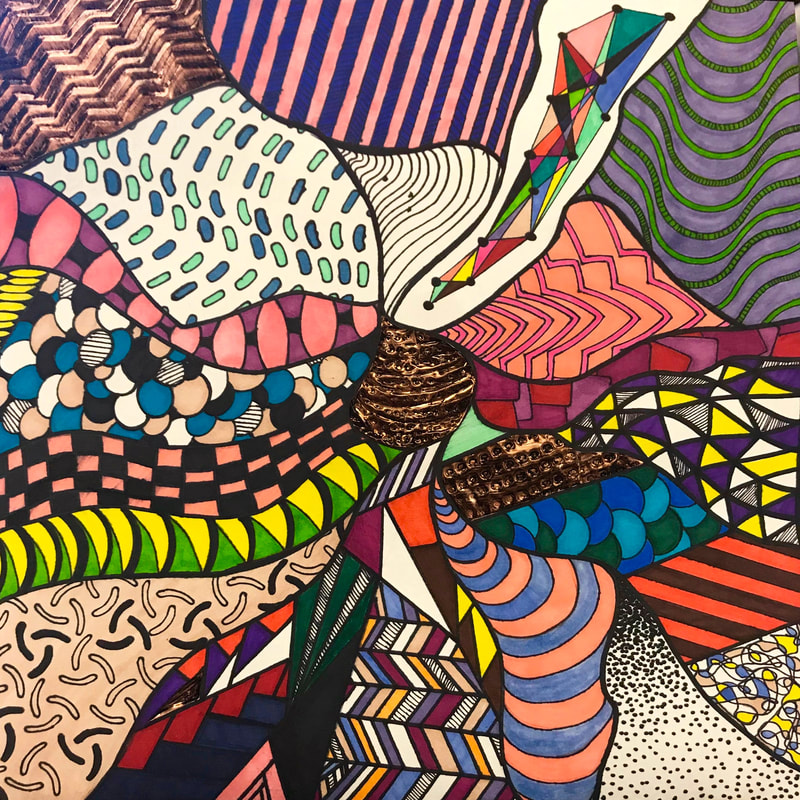
This project yes a mix of Zentangle drawing and a copper repousse. The Zentangle paper will be a 12" x 12" square and the metal sheet will be 6" x 6". A 5 1/2" square will be cut out somewhere in your design and be replaced with the copper sheet. The copper sheet will be taped on from the back side. The cut out can be anywhere on the paper as long as you leave 2" to the edge of the paper. The Zentangle pattern will continue on to the copper sheet where the design will be tooled out. Choose the most interesting area in your design to place your copper sheet. This is usually an area where several designs come together or a large intricate design is placed.
What is Zentangle?
Zentangles are very different from regular drawing. They are a form of artistic meditation that even non-artistic people can do. The Zentangle process is just as important as the final product. Tangles are similar but different than doodles. Doodles are done without paying attention or concentrating on what you are doing. They are often done as a distraction during times when you are involved in another activity like listening to a teacher or in a meeting. Zentangles require more focus on the actual design.
Zentangle Directions
Copper Foil Directions
Refinement
Ask a friend to help you look for messy areas. Check to make sure your metal pattern is easy to see. Repress the metal in areas that need to be raised more.
This project yes a mix of Zentangle drawing and a copper repousse. The Zentangle paper will be a 12" x 12" square and the metal sheet will be 6" x 6". A 5 1/2" square will be cut out somewhere in your design and be replaced with the copper sheet. The copper sheet will be taped on from the back side. The cut out can be anywhere on the paper as long as you leave 2" to the edge of the paper. The Zentangle pattern will continue on to the copper sheet where the design will be tooled out. Choose the most interesting area in your design to place your copper sheet. This is usually an area where several designs come together or a large intricate design is placed.
What is Zentangle?
Zentangles are very different from regular drawing. They are a form of artistic meditation that even non-artistic people can do. The Zentangle process is just as important as the final product. Tangles are similar but different than doodles. Doodles are done without paying attention or concentrating on what you are doing. They are often done as a distraction during times when you are involved in another activity like listening to a teacher or in a meeting. Zentangles require more focus on the actual design.
Zentangle Directions
- Choose patterns to use in your design. There are hundreds of websites that show step by step designs. There are also several books in the art room that you can use for ideas.
- You may draw your patterns lightly in pencil then trace your lines with marker or just go for it using only your marker.
- Use a minimum of 5 patterns -You must have areas that are white, light, medium, dark and black because of the amount of pattern or filled in designs.
- Consider contrast when choosing patterns - Big and small shapes, thick and thin line, white and dark shapes, detailed and plain areas, etc.
- Balance out patterns spreading them around the paper evenly so that each area is not too close in pattern size or value to the area beside it.
- The patterns should fill 90% of the paper so that there is little to no areas left blank
- Be very neat. If you draw things in pencil first, place a scrap of paper under your hand to prevent smudging.
- Color in the the patterns with colored pencils or colored Sharpie markers.
Copper Foil Directions
- Draw the image onto a sheet of regular white paper the same size as your foil.
- Put your drawing on top of your foil and tape it down.
- Place it all on a foam sheet (you need a soft surface) and then lightly outline your entire drawing with a dull pencil or wooden tool. How hard you press depends on the thickness of your paper and foil. The foil will tear if you push too hard.
- Once you have your image transferred, you can start embossing. Make sure you work on a foam sheet. There are wooden tools and popsicle sticks that can be used to shape the metal.
- Press over the lines to make them pop out more. Try flipping over your design and doing some chasing on the other side.
- To age it and create more dimension, paint the foil using India ink (waterproof black ink). Simply painted it on, then wiped away some of the wet ink with a paper towel. The ink will stay in the recesses and make the overall design pop out more. Experiment until you get the amount you like. BE CAREFUL - THE INK WILL NOT COME OUT OF YOUR CLOTHES.
Refinement
Ask a friend to help you look for messy areas. Check to make sure your metal pattern is easy to see. Repress the metal in areas that need to be raised more.
