|
|
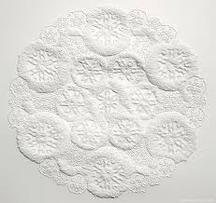
When you have completed your art piece, take a photo of your finished and turn it in to Canvas .
Overview
Quilting is a very old form of folk art. Read the background information before beginning this project. Because it is not possible to actually make a quilt in class, we are going to pay homage to the quilt by creating one quilt block design.
Click on the link below and read the article.
A Brief History of Quilting
View the PPT below.
Quilts in America (PPT)
Planning (YOU CAN NOT SKIP THIS STEP AND BE SUCCESSFUL WITH THIS PROJECT)
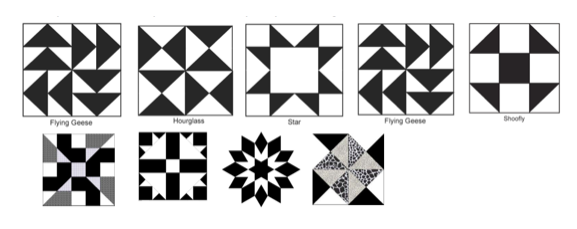
Study the online quilt block samples to get ideas for your design. Create a Pages document. Drag and drop 7 of your favorite quilt blocks. Answer the following questions on the pages document. Save it as last name.first name.Quilt Research and export it as a PDF. Upload your PDF to Canvas.
Quilt Pattern Website 1
Quilt Pattern Website 2
Quilt Pattern Website 3
Quilt Pattern Website 4
Quilt Pattern Website 5
Quilt Pattern Website 6
Quilt Pattern Website 7
Overview
Quilting is a very old form of folk art. Read the background information before beginning this project. Because it is not possible to actually make a quilt in class, we are going to pay homage to the quilt by creating one quilt block design.
Click on the link below and read the article.
A Brief History of Quilting
View the PPT below.
Quilts in America (PPT)
Planning (YOU CAN NOT SKIP THIS STEP AND BE SUCCESSFUL WITH THIS PROJECT)
Study the online quilt block samples to get ideas for your design. Create a Pages document. Drag and drop 7 of your favorite quilt blocks. Answer the following questions on the pages document. Save it as last name.first name.Quilt Research and export it as a PDF. Upload your PDF to Canvas.
- Study your choices. Name the top 3 most commonly found colors in your choices in order of " appearance.
- What is your favorite pattern? Why?
- Is there an element that shows up in a lot of your design choices (a shape, design, etc.)? What is it " and can you think of way to incorporate that element into your final design?
Quilt Pattern Website 1
Quilt Pattern Website 2
Quilt Pattern Website 3
Quilt Pattern Website 4
Quilt Pattern Website 5
Quilt Pattern Website 6
Quilt Pattern Website 7
Practice Mini Block
As part of your planning, you will be creating a small quilt block on a 6" piece of paper as practice. This block will be turned in for a grade. You may create a unified design so that it looks like an actual quilt block or you can try out a variety of designs and techniques. The second option will not look like a real block, but you will be able to try out some of your ideas before completing the final block.
1.. Watch the video "Measuring a 9 Square Grid" by clicking the button below. After you have viewed the video, get a mini practice square (6" paper) and draw a 9 section grid on the square. Directions are given in the video. Save the grid to use as part of your Mini Block.
2. Watch the video "Tools of the Trade" which reviews all of the materials you will need to complete this project.
3. Using the Mini Quilt Block, plan and try out designs. Watch the short video below before beginning. Most quilts are based on a grid. You will be using a 9 patch grid. Draw out a design (s), and practice punching holes on your pencil lines.
4. After watching the video below, add color and designs to your Mini Quilt Block. This is practice so you can try out many different things that you normally would not put together.
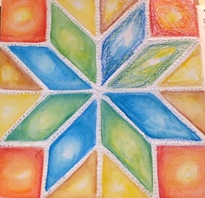
Take a picture of your Mini Quilt Block and submit it to Canvas
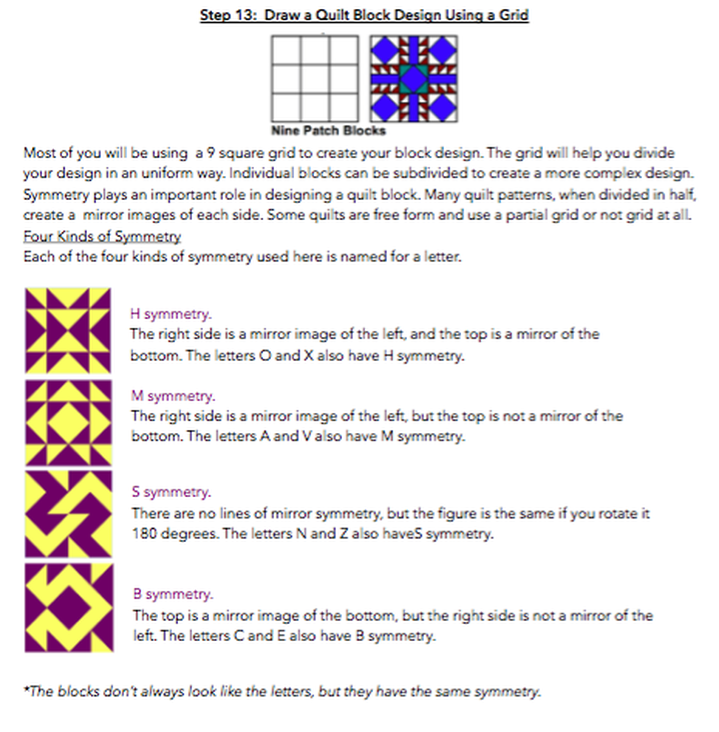
When you are ready, draw your final design on the back of your final paper (12" x 12"). Choose a design with care. The design should be mid-range in complexity. It will not look interesting if it is too simple and you will struggle with your hole punching if it is too complex. You may choose an existing pattern or create one of your own. Remember your design should translate well with a dotted outline so it can not be too simple or extremely complex. Below is some helpful information about designing using a grid.
When you are ready, draw your final design on the back of your final paper (12" x 12"). Choose a design with care. The design should be mid-range in complexity. It will not look interesting if it is too simple and you will struggle with your hole punching if it is too complex. You may choose an existing pattern or create one of your own. Remember your design should translate well with a dotted outline so it can not be too simple or extremely complex. Below is some helpful information about designing using a grid.
Final Project
Materials List
1. 12” x 12” white paper 4. Ruler 7. Cup of Water. 10. Piece of Foam
2. Thumbtacks 5. Pencil 8. Paintbrush
3. Planning paper 6. Water Soluble Pastels 9. Paper Towel
1. Unless you are creating a free-form design, you will need to create a grid on your paper. The final paper is a 12" x 12" square that will be divided into 9 squares. Each square will be 4" x 4". Use a ruler to get accurate measurements and straight lines. Remember, you need at least 3 marks to connect to make a straight line.
2. Lightly draw your design on the back of your paper.
2. Place your final paper face up on a piece of foam. The foam is smaller than the paper, so you will need to move it around to keep it under the area you are punching. Begin at one corner of your design. Use a thumbtack to punch through leaving a tiny hole right on the corner of your design. Continue to punch holes all along your pencil lines. Be careful not to get too close to your previous dot. This will cause your paper to rip. Spacing between dots should be about 1/8”. If the dots are spaced out too much, your design will be hard too see. All of your design lines need to be punched. Be cautious and don’t rush. It is very easy to tear you paper. Watch areas on your designs where several lines come together, because multiple punches in one area will cause the paper to weaken and rip.
4. When the piece is totally punched, flip over the paper. Your design will be viewed from the other side so you pencil lines will not show. If you would like, small sections can be punched multiple times to fill in the space. An example of this can be seen in Instructional Video 1 on the Crazy Quilt pattern. Be cautious not to rip the paper by punching holes too close together. Also keep in mind that you will not be able to add color on top of the punched holes. If you would like color in that section, color it first then come back and punch your holes once the color is dry.
5. The next step is to add color with water soluble pastels and Sharpie (if desired). Sharpie designs should be added before the water-soluble pastels. Water-soluble pastels look like big crayons. Color the sections created by the punched lines, but not the hole punch.
6. Plan out both the colors and patterns. If you study a real quilt, you will notice that colors repeat in patterns. Your quilt should be planned as well. Do not just put colors in random places. Once the squares are colored, use water and a paint brush to spread the color out like paint. It only takes a little bit of water to make the colors blend. Have a paper towel ready to wipe color off the brush as you go. Start blending in the lighter area and work your way out to the darker. The darker color will cover up the lighter if you brush it into the lighter color.
Remember . . .
-Color Lightly
-Dark colors on the outside
- Light colors on the inside
- Layer multiple colors (test to make sure colors look good blended) Each shape should have a minimum of 3 colors
- Use a paint brush with very little water to blend colors (pat wet paintbrush on a paper towel to remove access
water).
- Start with light colors and blend with water working out to the dark colors (dark colors will overtake the light
colors if pushed into them)
- Wipe your paint brush off often as you move from color to color to avoid transferring the color
Oil Pastels Maintenance
1. Take a set of colors for each table & share. There will not be enough for every person to have a full set.
2. The tips of the pastels break off easily. Don't put a lot of pressure on them when you are coloring.
3. You can use an X-acto knife to resharpen the points. Don't shave off too much. It should just be used to sharpen the tip.
4. Put the colors back into the proper sections.
