Foam Plate Print
. Turn in your completed artwork photo in to Canvas to be graded.
For this project you will create a design that incorporates an insect. The insect can be the focus of your design, part of the overall design, or hidden in the design waiting to be discovered. Be sure and choose an insect with an interesting shape and pattern. The color of the insect will not be important since you will print it in black on a colorful background.
This design should also include a lot of designs, patterns, or texture. By the time it is ready to print, most of the foam will be covered in some time of line work. Do not worry about trying to be realistic. This is a design and not intended to capture a realistic image.
This design should also include a lot of designs, patterns, or texture. By the time it is ready to print, most of the foam will be covered in some time of line work. Do not worry about trying to be realistic. This is a design and not intended to capture a realistic image.
Important Tip
When you print, your image will be backward from the original design. Keep this in mind as you plan your composition. We will not use any words for these projects. For future use, words would need to be backward when impressing your matrix so that they can be read when printed.
When you print, your image will be backward from the original design. Keep this in mind as you plan your composition. We will not use any words for these projects. For future use, words would need to be backward when impressing your matrix so that they can be read when printed.
Clean Up
The ink will clean up with soap and water. Each time you use a brayer, trey and foam plate, they will need to be thoroughly washed with soap and water. If they are not cleaned properly, the next print will have major issues with dried ink transfer and blotchy printing. The ink will fill the indention you have created in the foam causes your lines to be lost.
The ink will clean up with soap and water. Each time you use a brayer, trey and foam plate, they will need to be thoroughly washed with soap and water. If they are not cleaned properly, the next print will have major issues with dried ink transfer and blotchy printing. The ink will fill the indention you have created in the foam causes your lines to be lost.
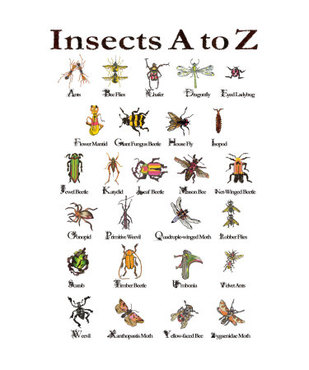
Brainstorm and Research
Create a list of possible bug choices. Look for interesting shapes and patterns. Think about the setting for your insect. Is it in a tree, on a leaf, flying, etc. Also include patterns and designs in your search by studying line art and design. This project will not have any shading. Everything will be created with line and solid shapes.
Websites
Bugs
Line Insect Drawings
Nature and Plants
Line Art Nature and Plants
Line Design
Visual Development
Develop Your Design: Arrange your design elements by creating 2 or 3 layout planning sketches (thumbnail sketches) in your sketchbook that include a bug, nature, and line design. These sketches are for planning placement or working out your initial ideas. You don't need to be detailed at this point. Once you have completed your sketches, makes some decisions about what you want for your final art piece. One of the great things about printmaking is that you can print a copy and then continue to work on your design.
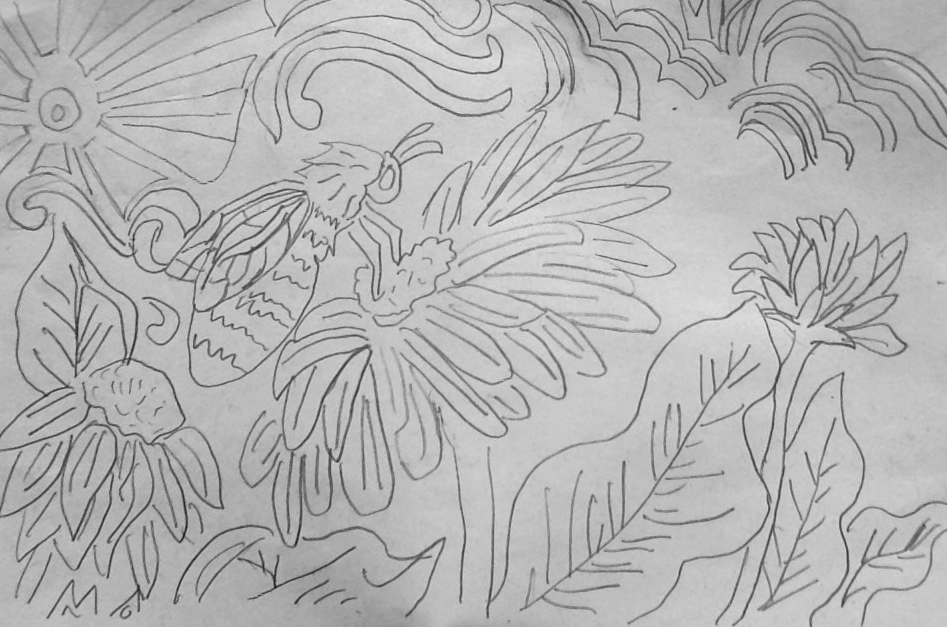
Create A Rough Draft: Your rough draft will be transferred to the foam sheet (See Photo 1). For your rough draft, draw the main elements of your design. It is not necessary to include the background or all of the interior details yet..
First Draft Transfer: Use a tool or a blunted pencil to press down your lines. Press the lines as deep as possible without tearing the foam (use care). Keep edges sharp and clean. At this point your are keeping the design simple.
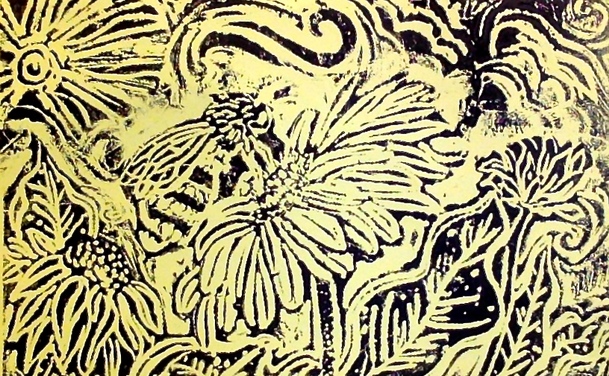
First Draft Print: Print the unfinished design ( See Photo 2 below) and use a sharpie to add designs to the background (See Photo 3 below). It may take several prints to get it just right. Using your prayer and a print trey, roll out a thin layer of ink in the trey. It should make a clicking noise from the friction of thinning out the ink. Roll the ink over the plate. Place your practice paper over the top of the wet foam plate. Gently rub the back of the paper being careful not to move the paper creating a blurred image. Peel off the paper and allow it to dry. Make several prints that you can experiment on with Sharpie.
Design Tips: If the overall design is too simple or to complex, the design will not be a success. You may want to leave some breathing space just around the edge of the main images to help them stand out from the background. Think about varying line thickness. Use different types of line like curved, zig zag, and dashed. Finish the rough draft with all your corrections to transfer to the foam plate (See Photo 4 below)
PHOTO 1 - 1st Rough Draft
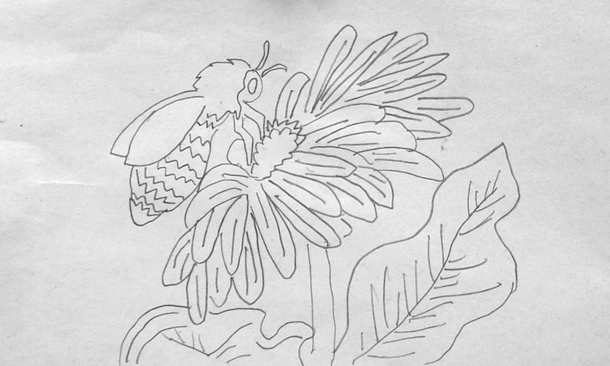
PHOTO 2 - Rough Draft Print without background details.
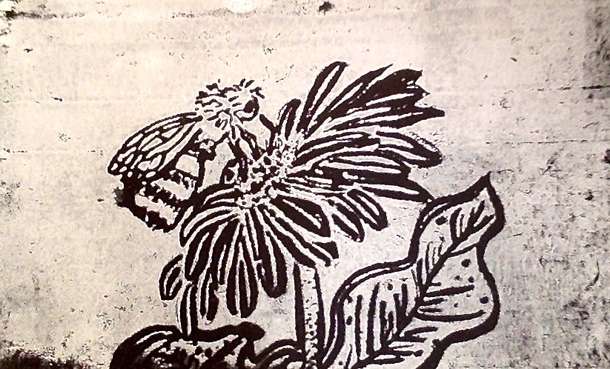
PHOTO 3 - Rough Draft Print in process of adding background details with Sharpie Marker Design
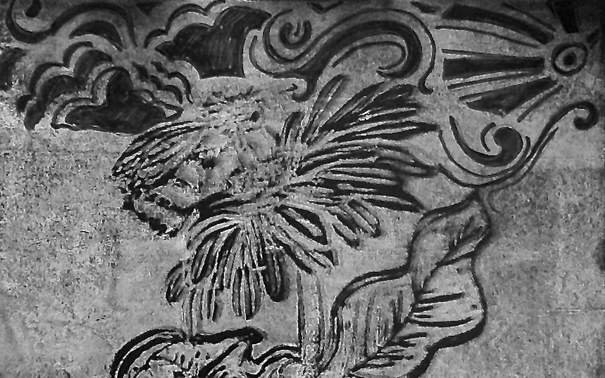
PHOTO 4 - 2nd Rough Draft with more flowers, leaves, and background pattern added
Final Design
Once you have something you are happy with, you can transfer the rest of the design to the foam by coloring the back of your final practice prints with an ebony pencil. Lay it on top of the foam and trace the rest of your design. Using a tool or blunted pencil, go in and press the rest of your design. Keep edges sharp (See Photo 5 below).
You will want to create a 2nd practice print. If there is anything that need touched up or fixed, it should be done at this point (See Photo 6 below).
PHOTO 5- Foam Plate with incised lines

PHOTO 6- Final Practice Print
Watercolor Background Paper
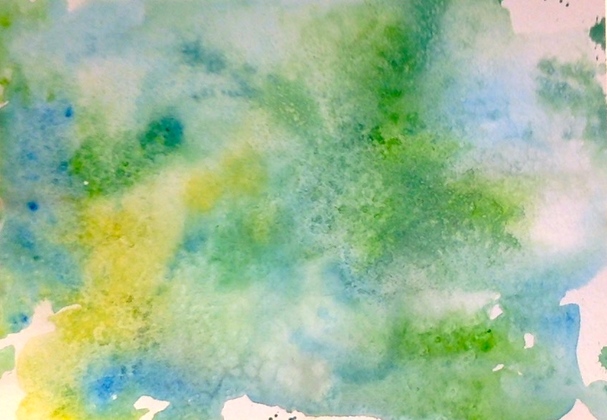
The finished piece will be printed on paper with a watercolor wash (See Photo 5 below) using a technique called Wet on Wet. This technique is a hallmark look for watercolor paint. Wet on Wet requires a high quality paper, which tends to be very expensive. Because of the paper cost, you will only be given one piece of paper for the piece you will turn in for a grade. You may want to try the technique out on scrap paper first. The results will not be as good as the final paper, but it will still give you some experience with the concept.
Color Choice
Before beginning, decide on the colors you will be using. The Wet on Wet technique is done quickly so make all artistic decisions prior to beginning. Limit colors to 3 or 4. The colors used in the example are green, yellow and blue. Make sure you test colors before painting on the final to ensure they make a pleasing color when they mix together. (Avoid mixing complementary colors because the result is a grey or brown color)
Salt Option
To create texture, salt can be sprinkled in to wet paint. Allow the paint to dry completely. Brush off the salt so that it leaves a texture on the painted surface.
Painting the Background
Have all of your materials out and ready to go. The watercolor paint is a concentrate so you must add water to it. Never use full strength paint. Watercolor is made to be transparent and not opaque.
Squeeze out about a pea sized amount of watercolor to your paint palette. Add enough water to each color creating a fairly saturated mixture.
Using a large, clean brush, cover the entire surface of your paper with a thin layer of water. It should wet the paper but not be so heavy that there are puddles on the surface.
Working quickly, begin dropping colors on top of the surface of the paper. The paint will begin spreading around on the wet surface on its own. Continue to drop colors allowing them to spread together. You don't need to totally cover the background, but most of it should have some color. The paper can be tilted slightly to encourage color movement.
There is some room for manipulating where colors will go so that a certain color may fall under a particular area of your print. For example, if your bug is red, you could make sure there is some red in the general area where the bug is on the design. Overall, the colors create a flowing, abstract design.
If you choose to add salt, it will be done after the colors are added but before the paint is totally dry. Group the salt so that it is not evenly spread across the paper. You only need a light sprinkling. Place the paper in the drying rack so it can dry flat. Once the paint is dry, brush off the salt so that the surface is smooth.
PHOTO 7 - Watercolor Background
Final Print
While your painting is drying, you can create a few prints on the colored papers found in the scrap bin. These prints can be used as a backup you can turn in for a grade should your final piece have major issues.
We will be using black ink on the final piece. A scoop of black ink, the size of a small grape, will be placed at the top of the rolling tray. Take the brayer and begin rolling it up and down to spread the ink across the surface. This will create some friction softening the ink so that it spreads well. You want a nice thin layer and not a heavy application. As the paint thins, you will hear a crackling sound. Roll the ink over the the foam print getting a thin even coverage. You need to work quickly so the ink doesn't begin to dry. When the plate is fully covered, position the final paper above the foam. Once the paper is laid on top, it can't be repositioned. Center the paper over the foam. Gently lay the paper on top of the foam being carefully not to let is shift back and forth. Once the print is on the foam, gently rub the back of the paper to press it down. Again, avoid allowing the paper to shift. If the paper moves, your print will be blurry. You can also use a clean brayer to roll the back of the paper. I find that I have better control with my fingers. Make sure you rub the entire surface especially the edges. Areas left untouched will not have a strong ink presence. Gently lift the print off the foam and place it in the drying rack to dry.
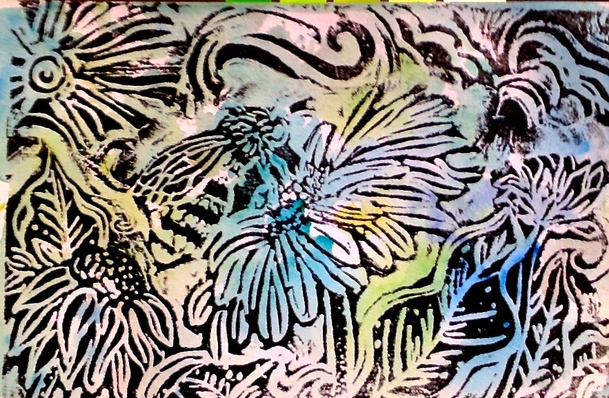
PHOTO 8- Final Print