Gap Project #1
When you have completed your art piece, take a photo of your finished art and turn it in to Canvas.
Please choose one of the two projects below to complete and turn in at the end of this 9 weeks. These projects are to be done during times when you finish early, are waiting for something to dry, or just need a break from a project. You only need to choose one. Details directions are in the notebooks provided in class. This page has a limited amount of information.
Choice 1 - Altered Book
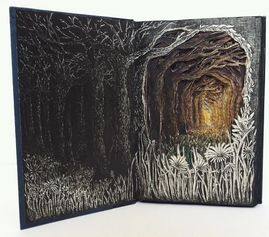
TUNNEL BOOK https://isobelleouzman.com/altered-books/
|
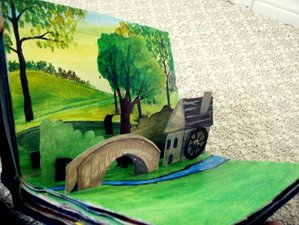
POP-UP https://ayatannur.wordpress.com/tag/pop-up/
|
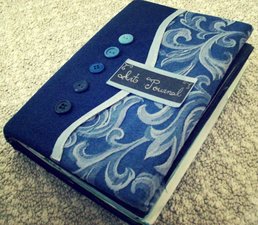
FABRIC COVER -https://ayatannur.wordpress.com/tag/pop-up/
|
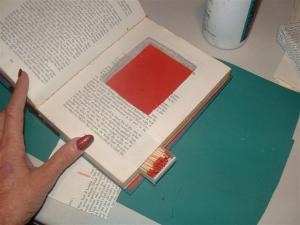
ADD A POCKET http://loopylace.com/anniescrazyworld/?cat=11
|
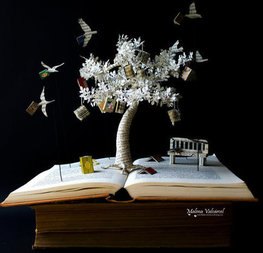
BOOK SCULPTURE http://www.scoop.it/t/book-sculpture/p/4030198176/2014/10/21/the-tree-of-knowledge-book-sculpture-book-art-altered-book
|
WINDOW AND DRAWER http://loopylace.com/anniescrazyworld/?cat=11
|
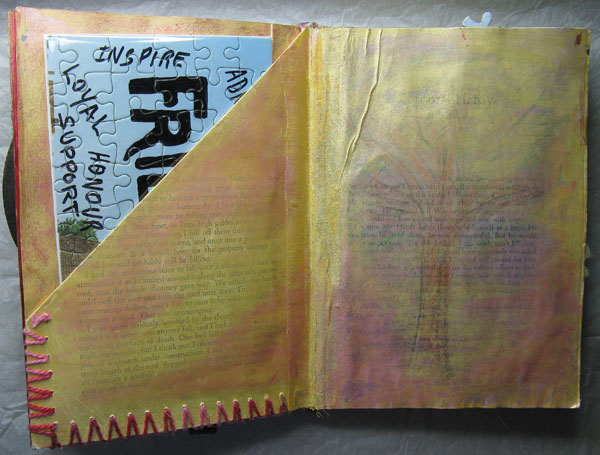
An altered book is a piece of artwork that is created using an old book. There is no right or wrong way to create your art piece. Some books are carved and folded to create sculptures. Other books have pages removed, glued together, and painted. Spend time researching ideas before beginning.
Book Ideas:
Tunnel Books
Pop-Up Books
Sculpture
Themed - Should have about 8 spreads completed (or about 16 individual pages)
Tips:
Choose an old book (hardcover only)
Decide on a theme
Collect materials
Remove about 1/3 to 1/2 of the pages depending on the book size.
- Start by removing every 3rd or 4th page, more pages can be removed later as needed
- Plan ahead - if you are gluing a block of pages to create a window, pages within the block don't need to be removed
- Use a ruler
- Lay the ruler close to the "ditch" but not in the ditch
- Lift the corner of the paper and rip the the page from top to bottom along the edge of the ruler
- Make sure to leave a paper tab (about 1/2") so that pages aren't removed at the stitching (removing pages at the binding will cause the book to fall apart)
- Drizzle glue on the page- use just enough to glue down page, excess glue will cause buckling
- Use a piece of cardboard to scrap the glue around the page and to remove excess glue (this help prevent massive wrinkling)
- Don't glue pages with the book opened flat because the will dry at an angle causing the book not to close
- The back of the book should be placed flat on the table while you open the cover 90 degrees.
- After the glue is spread, lay the prior page on top so that it lays flat on the glue surface
- Use a clean piece of cardboard to work out wrinkles on the top page - start in the center work out toward the edge
- Wipe any excess glue that squeezes out of the edges
- If pages are wet, you may need to place something between them as they dry so that that don't glue themselves together
take time to explore/plan before beginning)
Decorate the cover as your last step so that no damage occurs while creating the inside of the book
Websites
A Crash Course on Altered Books
All About Altered Books
What are Altered Books?
Altered Book Links
Karen's Whimsey Altered Books
Altered Book Sculpture
Pop Up Book
Pop Up Directions
Choice 2 - Cardboard Art
When you have completed your art piece, take a photo of your finished art and turn it in to Canvas.
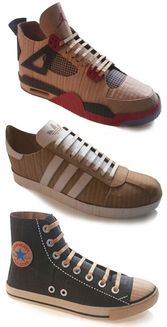
SHOES http://weburbanist.com/2009/10/19/12-cardboard-artists-who-think-outside-the-box/
|
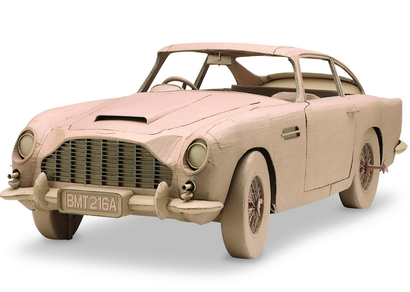
CAR http://www.inhabitots.com/book-review-the-art-of-cardboard-showcases-visionaries-who-turn-humble-cardboard-into-astonishing-varied-works-of-art/art-of-cardboard-2/?extend=1
|
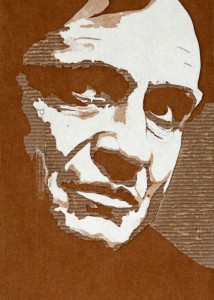
PORTRAIT http://www.gilesoldershaw.co.uk/shop/
|
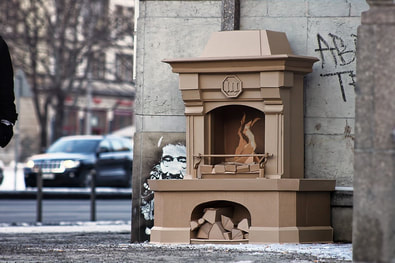
LIFE SIZE FIREPLACE http://blog.gessato.com/2012/10/22/paperstuff-by-bartek-elsner/
|
OBJECT http://blog.gessato.com/2012/10/22/paperstuff-by-bartek-elsner/
|
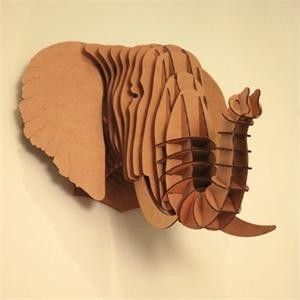
ANIMAL http://vi.sualize.us/vrouilly/laser-cut/?page=2&waterflow#page4
|
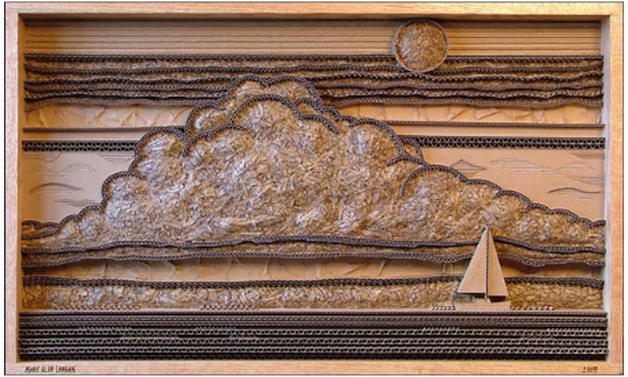
https://www.ndigallery.com/by-artist/mark-langan/product/star-of-david
|
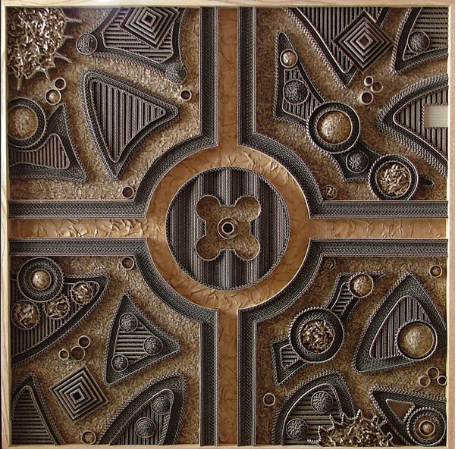
https://www.ndigallery.com/by-artist/mark-langan/product/star-of-david
|
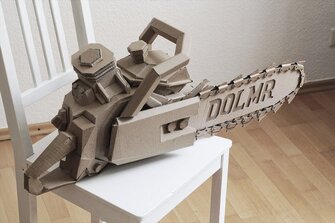
For this project you will create some type of art using cardboard. You may create a full sculpture, a low relief sculpture (Raised pieces glued to a flat background), or a flat art piece. Please see the notebook for more information.
Safety
Use care when handling the knife
Place a cutting mat below your cardboard when you cut
Techniques
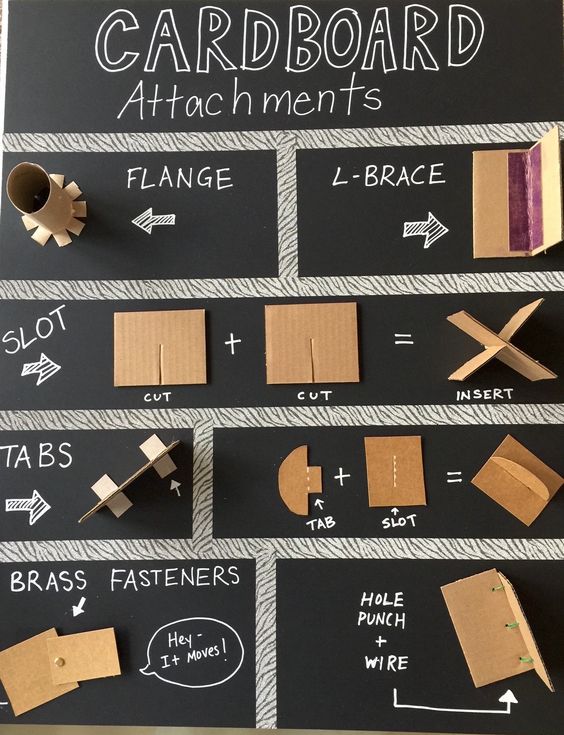
Review the technique chart in the information notebook for joining cardboard (Scoring, Seaming, Notching, etc.)
Change blades often as they dull for ease of cutting
Use hot glue to attach pieces
Websites
30 Amazing Cardboard Sculptures
More Cardboard Sculptures
Cardboard Sculpture
Cardboard Techniques
Techniques
Safety
Use care when handling the knife
Place a cutting mat below your cardboard when you cut
Techniques
Review the technique chart in the information notebook for joining cardboard (Scoring, Seaming, Notching, etc.)
Change blades often as they dull for ease of cutting
Use hot glue to attach pieces
Websites
30 Amazing Cardboard Sculptures
More Cardboard Sculptures
Cardboard Sculpture
Cardboard Techniques
Techniques
https://www.theartofed.com/2016/03/17/tapping-declarative-procedural-knowledge-art-room/
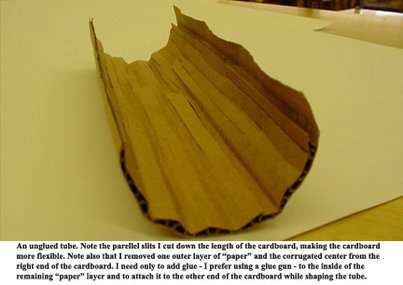
CUT PARALLEL LINES THROUGH THE TOP LAYER TO ALLOW THE PIECE TO BEND EASILY
http://4.bp.blogspot.com/-rPbOzkUCXHE/USWPEB2Dj8I/AAAAAAAAAbM/0Nv04-QA0zU/s1600/Tube.Shape.Example.1.72.jpg
|
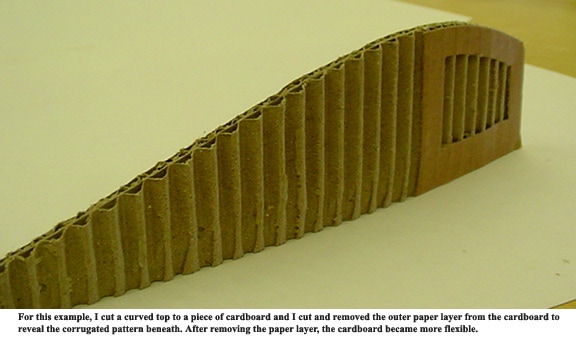
PEEL OUTER PAPER LAYER TO REVEAL FLUTTING
http://3.bp.blogspot.com/-Am2s6Bc0Rc8/USWP3M_Fc4I/AAAAAAAAAbU/ZV_5gqDawC0/s1600/Demo.Example.3.jpg
|
