You will be completing 2 projects that will help you improve your shading skills.
Basic Shape Value Shading Mini-Project
http://www.artinstructionblog.com/drawing-lesson-a-theory-of-light-and-shade
The focus for this project is two-fold - drawing basic shapes and using a single light source.
Directions
Take a photo of your finished work and turn it in to Canvas
Directions
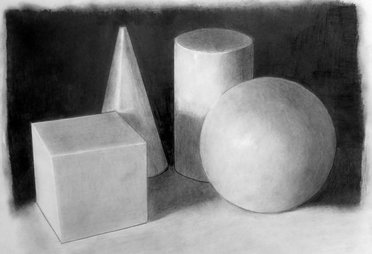
- There are two geometric shape still lifes set up in the room. Choose the one that you can see the best from your seat.
- You may use a drawing board at your table or in your lap so that you can draw parallel to the surface of the board.
- Draw the shapes as you see them including sides and tops. Remember the things we learned about drawing basic shapes
- Decide on paper direction (vertical or horizontal).
- Fill the paper with your drawing.
- Draw lightly and draw large
- Don't set objects on the bottom of the paper
- Shade the forms using the smooth shading technique (tight, overlapping circles)
- Use graduated shading so that tone changes have a smooth transition as the fade into another tone
- Pay attention to your light source, highlights, mid-tones, and shadows
- These forms are white. Make sure your shading reflects this
- The background should be shaded dark so that the white forms stand out. You may fade the background shading out as you get close to the edge of the paper
- There should be no visible out lines when you are finished. Shapes should be determined by changes in value
- Be neat. Put scrap paper under your hand to avoid smearing the graphite. Clean up smears and fingerprints.
Take a photo of your finished work and turn it in to Canvas
Directional Shading and Graduated Tone
The focus of this project is to learn how to use graduated shading and create an awareness of how values effect each other when placed side by side.
Sketchbook Assignment
Before beginning this project, practice directional shading. Below is a chart that you need to replicate in your sketchbook. There are 11 boxes with a written description for each listed at the bottom of the image. You must do all 11 boxes. Each box should be approximately 1' x 1". Shading should be smooth and done without smudging. Try to get smooth transitions from one tone to the other. Be neat and stay inside of your box edges. Send a photo of your directional shading chart into Canvas.

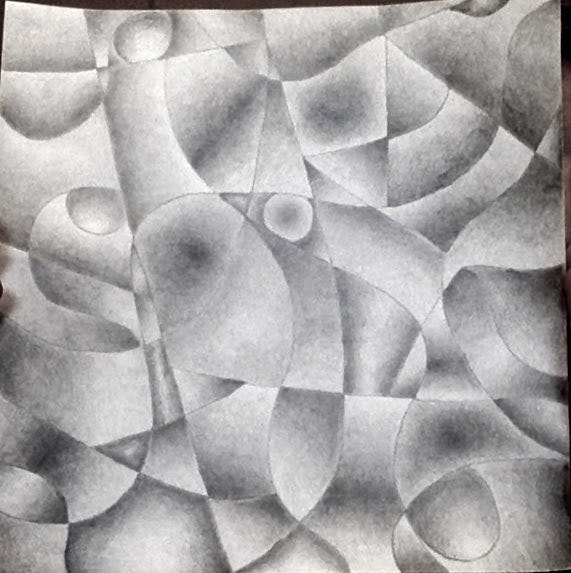
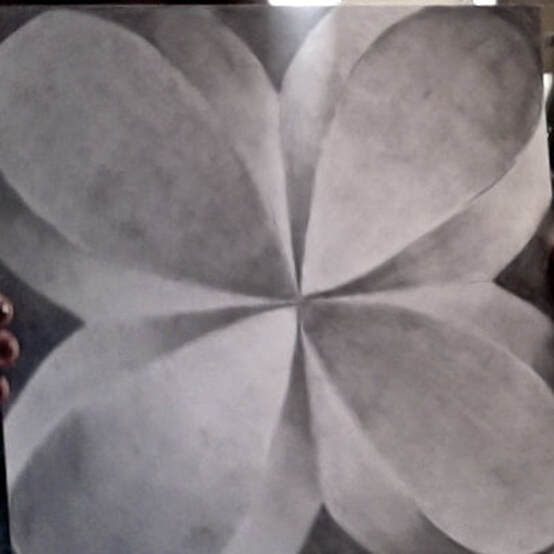
Graduated Complex Design
Content Target. . . Students will examine the technique used to gradually blend value from light to dark
Language Target. . . Students will design an abstract design and fill in the shapes with graduated shading so that sections of light areas touch sections of darker areas
Content Target. . . Students will examine the technique used to gradually blend value from light to dark
Language Target. . . Students will design an abstract design and fill in the shapes with graduated shading so that sections of light areas touch sections of darker areas
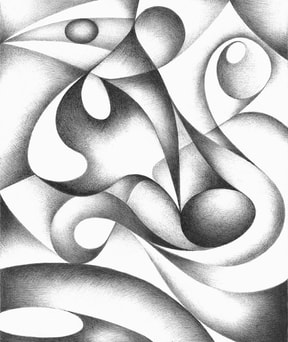
For this project you will create an abstract design and use graduated shading to add emphasis to the shapes. There are examples below to help you get started. Please don't copy any of the examples.
Directions
1. Grid Design
4 Square
1. Grid Design
- The easiest way to create this design is by using a grid.
- You are not required to use a grid but it is helpful if you are struggling for an idea.
- Below are a few examples of grid designs.
- The 4 square is the most basic. Your design is created in one square then flipped and copied into the other 3.
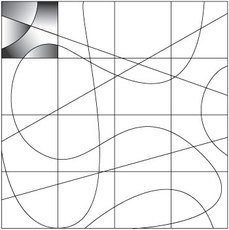
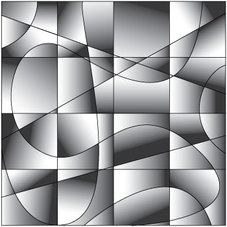
- The second grid has 16 squares. In this case, the squares help divide the space for a more complex design. A random design is placed no top to create interest..
- Designs should be of a medium complexity.
4 Square
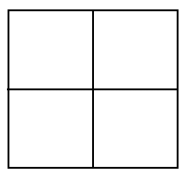
4 Square Grid
|
Drawn design that will be flipped and repeated with shaded design
|

http://www.artsonia.com/museum/
gallery.asp?exhibit=159707
|
16 Square
http://juliannakunstler.com/art2_
valuedesign.html#.VtCmqseYdfi
|
http://juliannakunstler.com/art2_
valuedesign.html#.VtCmqseYdfi
|
http://juliannakunstler.com/art2_
valuedesign.html#.VtCmqseYdfi
|
2. Gradiated Shading
3. Painted Accents
- Once you have drawn out your design, you may begin to add your shading. This will take some planning.
- First, choose 3 small areas that will be painted with one color later.
- Choose areas near but not in the center of the piece
- Don't choose a shape that touches or almost touches the edge of the paper
- DON"T SHADE IN YOUR SHAPES. These will be painted in later.
- Each section should have at least a light value so that no section is totally left unshaded.
- Values beside each section should vary so that each section stand out from the other.
- Every section should use graduated shading so values gradually lighten or darken.
3. Painted Accents
- Choose one color plus black and white for you accent pieces
- These sections should be painted using graduated shading so that the color goes from dark to light in some way
https://www.etsy.com/listing/106235656/
original-abstract-drawing-black-and
|
|
4. Craftsmanship
Examples
- Place a piece of paper under your hand to avoid smudging
- Use the smooth shading technique
- Erase any smudges
- Stay within your lines filling each section to the edge
Examples
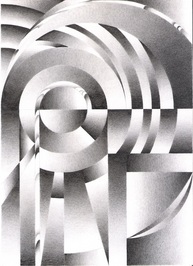
http://hubpages.com/art/Learning-Shading-Step-By-Step-From-An-Amateur-Artist#slide2984347
|
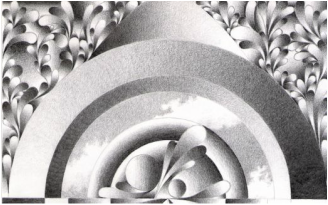
http://hubpages.com/art/Learning-Shading-Step-By-Step-From-An-Amateur-Artist
|
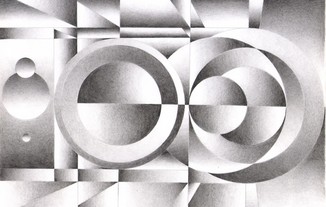
http://hubpages.com/art/Learning-Shading-Step-By-Step-From-An-Amateur-Artist#slide2982141
|
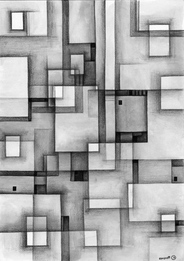
http://journalfodderjunkies.blogspot.com/2011/05
/compartmentalized.html
|
Former JCHS Student Examples
|
|
