Naive Low-Relief Cardboard Sculpture
When you have completed your art piece, take a photo of your finished and turn it in to Canvas
This project combines two aspects often seen in folk art. The first is a child like aesthetic in the design of the artworks. The second aspect is the use of found or free materials. In our case we will be using cardboard.
This project combines two aspects often seen in folk art. The first is a child like aesthetic in the design of the artworks. The second aspect is the use of found or free materials. In our case we will be using cardboard.

room9art.blogspot.com
|
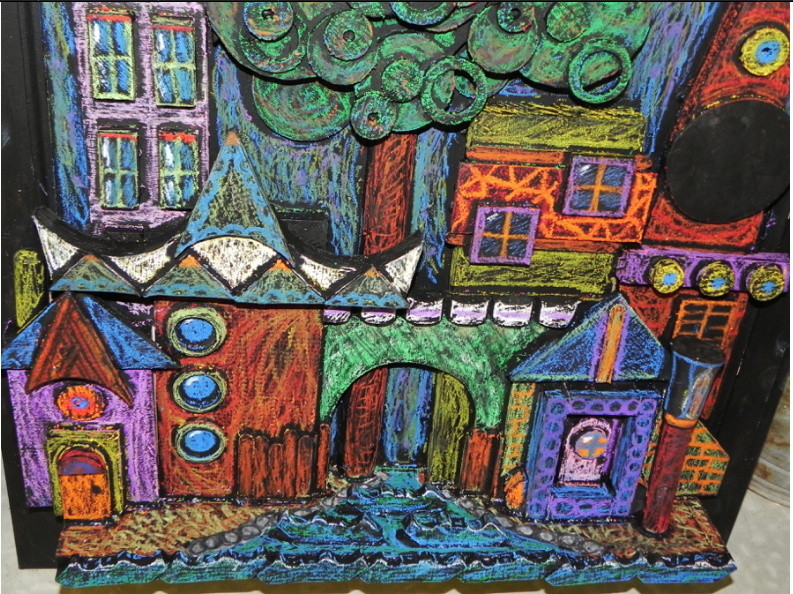
https://i.pinimg.com/originals/4e/7f/3e/4e7f3ee06e33caff9e67a45297bc1d99.jpg
|
Naive Art
https://theworldsartist.com/art-movement/naive-folk-art
The Naïve art movement is any form of art that is made by a man who does not have the formal instruction and preparation that a professional artist undergoes. Naive art is a grouping that is portrayed by a virtuous straightforwardness and childlike simplicity in its subject matter and technique.
The Formal Rules of Art, and the Naive Rules.
Rule 1. A decrease of the size of objects in the distance. With Naive artwork, objects in the foreground and background can be the same size.
Rule 2. Muting of colors with distance. In Naive, there is a strong use of pattern and color, without softening the colors in the backgrounds.
Rule 3. The decrease of the precision of details with distance, make them blurrier. Naive painting, an equal sharpness of details in the background and foreground.
Inspiration/Research
Spend some time looking at images of cities. Cities often have different vibes depending on why and where they were established. Older cities will have a different feel from a newer city. The size and terrain of the city will also determine how the city is laid out. Some cities were developed around an industry which alters the way they function and look. Below are a few examples.
Kannapolis - Textile Mills
Charlotte - Banking
New York City - Stock Exchange
Pittsburg, PA - Steel Mill
Los Angelas - Hollywood
As you are researching, look for things like the architecture styles, street layout, landscaping, etc. Notice other features found in cities like street lights, signs, billboards, water towers, train tracks, graffiti, etc. All of these things can add interest to your artwork.
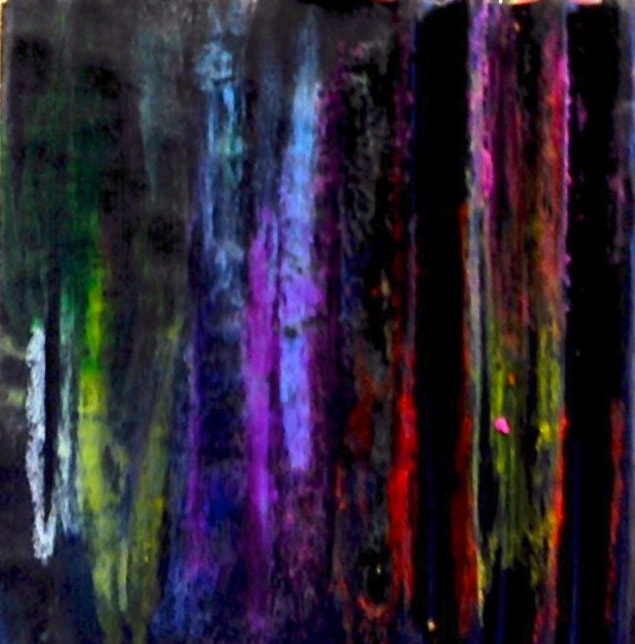
Test Pattern
Start by creating a test pattern. Take a 6" x 6" cardboard square. Tear off the top paper layer on half of the square to reveal the corrugation inside. Clean up any paper remnants Paint the entire square black and allow it to dry. Once it is dry, use pastel crayons to create textures and colors. Once you have completed the test pattern, take a photo and turn it in on Canvas..
Start by creating a test pattern. Take a 6" x 6" cardboard square. Tear off the top paper layer on half of the square to reveal the corrugation inside. Clean up any paper remnants Paint the entire square black and allow it to dry. Once it is dry, use pastel crayons to create textures and colors. Once you have completed the test pattern, take a photo and turn it in on Canvas..
Visual Development
After researching cities, begin to sketch out your ideas. This sketch will be used as a guide for the buildings you create out of cardboard. You should have a minimum of 3 layers not including the background. All of those layers don't necessarily need to be buildings. They may include trees, mountains, water towers, and any other item that may be seen in the distance.
Buildings don't need to be drawn in perspective or be proportionately accurate. Remember the rules of naive art that are stated at the top of this page. Be creative. Design extras that can also be cut out of cardboard and added to your final piece (windows, doors, architectural details, street signs, fire hydrants, cars, etc.). Vary heights and widths of the building. Leave a little sky showing through your objects. You may cut out areas, as well as, add layers on top of your objects.
Once you have a good plan, think about areas where the top paper layer can be removed to show the corrugation inside of the cardboard. This adds interest and texture to your final work.
Final Design
-Minimum of 16" x 20", (can be larger)
-Unbent
-All your buildings are glued on this piece and it is not cut
-Set aside until needed
Buildings and Details
-Get other cardboard pieces
-Draw directly on the cardboard (the cardboard will be painted black so pencil line and lettering are not going to show).
-Draw all of your extras items on cardboard
3. Cutting
Neatly cut out pieces with an X-Acto knife
Use a cutting mat so the tables aren't damaged.
4. Corrugation
Remove some paper layers to reveal the corrugation in at least 3 places
5. Lay Out
Lay out your entire work before gluing.
Make any changes or additions at this point.
6. Gluing.
Option 1: Glue all the buildings down first starting with the back row and working forward. This is followed by gluing all of your details.
Option 2: Glue all of your details to your buildings then glue the buildings down working from the back row forward.
- Use your sketch as a guide for your overall design.
- Cardboard
-Minimum of 16" x 20", (can be larger)
-Unbent
-All your buildings are glued on this piece and it is not cut
-Set aside until needed
Buildings and Details
-Get other cardboard pieces
-Draw directly on the cardboard (the cardboard will be painted black so pencil line and lettering are not going to show).
-Draw all of your extras items on cardboard
3. Cutting
Neatly cut out pieces with an X-Acto knife
Use a cutting mat so the tables aren't damaged.
4. Corrugation
Remove some paper layers to reveal the corrugation in at least 3 places
5. Lay Out
Lay out your entire work before gluing.
Make any changes or additions at this point.
6. Gluing.
Option 1: Glue all the buildings down first starting with the back row and working forward. This is followed by gluing all of your details.
Option 2: Glue all of your details to your buildings then glue the buildings down working from the back row forward.
Refinement
Go back over your work and look for areas that need improvement. This would includes things like erasing pencil lines, fixing painting mistakes, etc.
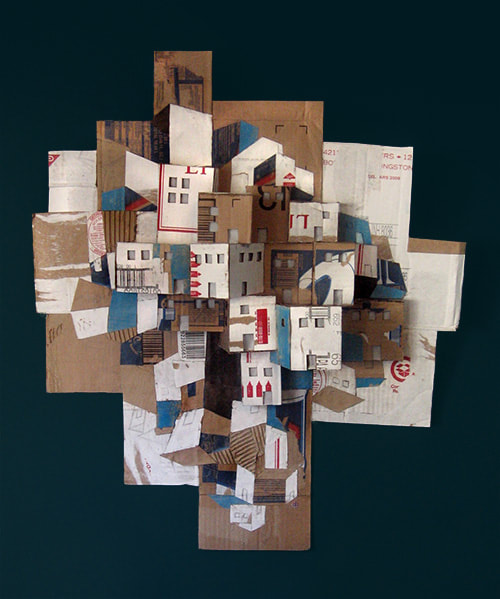
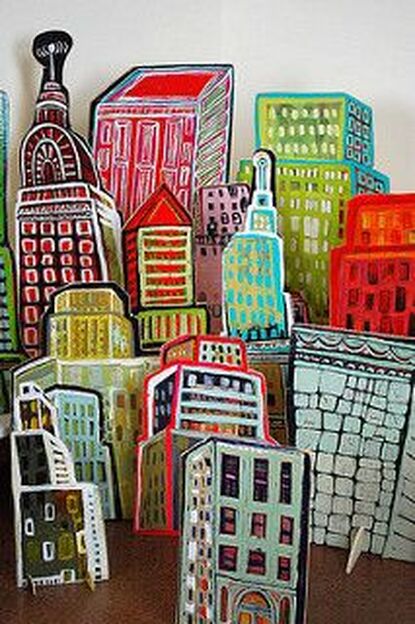
Below are some other ways artist have created cardboard cities.
Go back over your work and look for areas that need improvement. This would includes things like erasing pencil lines, fixing painting mistakes, etc.
Below are some other ways artist have created cardboard cities.
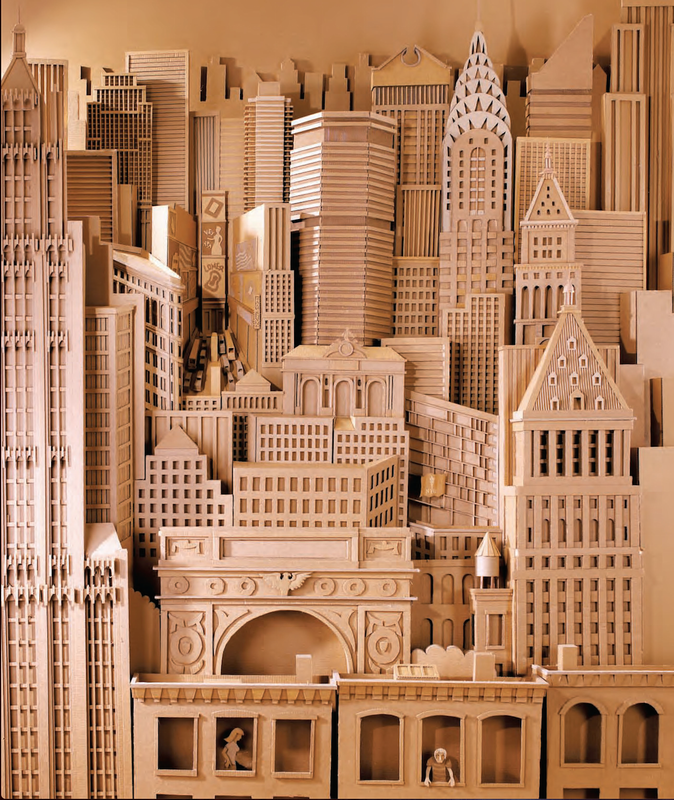
http://creativesafari.com/the-art-of-cardboard/
|
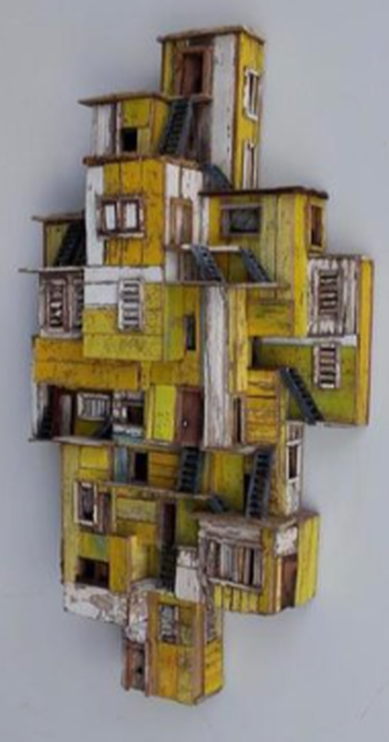
ericcremers.exto.org
|
http://www.usprisonculture.com/blog/2013/08/03/cities-of-refuge-an-art-project-about-transformative-justice-and-scapegoating/
|
https://www.flickr.com/photos/gilhooly_studio/7971973460/in/photostream/lightbox/
|
