Magazine Mosaic - Gap Project 2
Essential Question: How do artist choose tools, techniques, and materials to express their ideas?
I Can . . .
I Will . .
When you have completed your art piece, take a photo of your finished and turn it in to Canvas.
Essential Question: How do artist choose tools, techniques, and materials to express their ideas?
I Can . . .
- study the materials used to create recycled art
- understand how folk artists use materials found in their environment
- apply environmentally responsibility to my artwork
- create art in response to artistic problems
I Will . .
- incorporate recycled material to create a new product
- apply proper safety procedures when producing my art
- practice good craftsmanshi
When you have completed your art piece, take a photo of your finished and turn it in to Canvas.
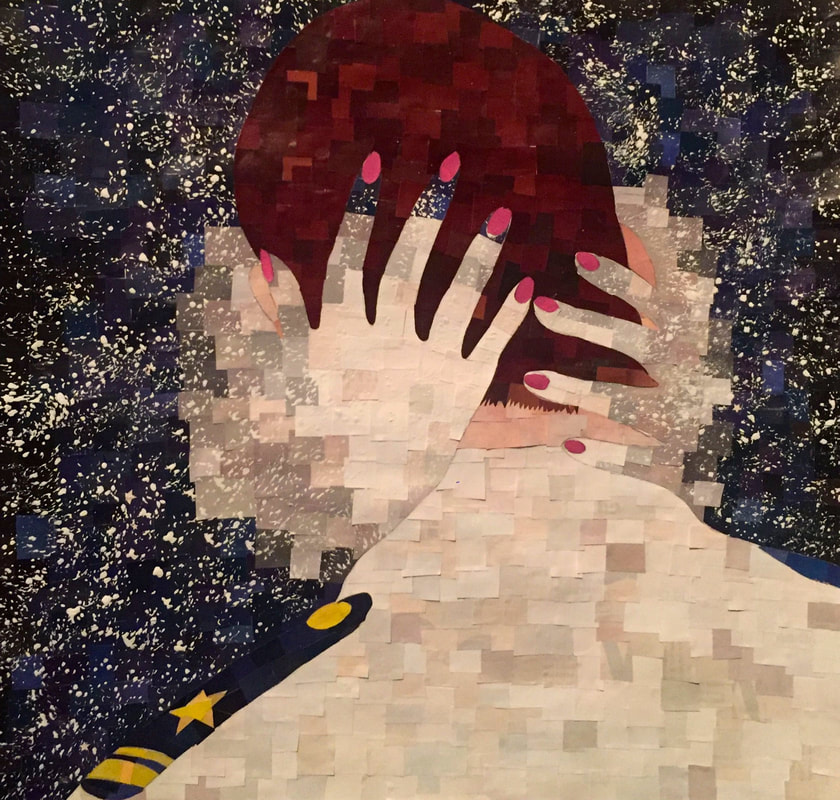
Lisa Roberts - JCHS Student
|
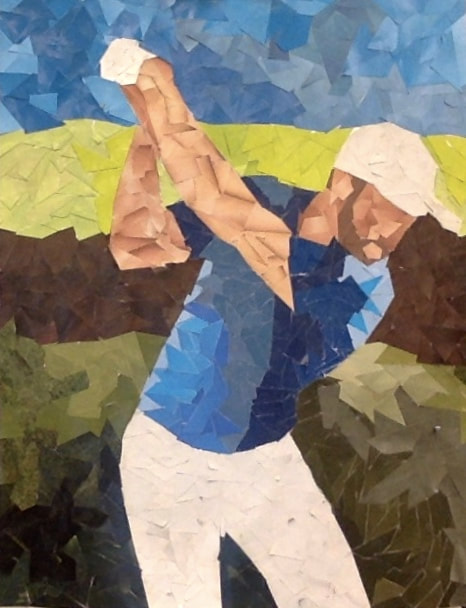
Jace Jones - JCHS Student
|
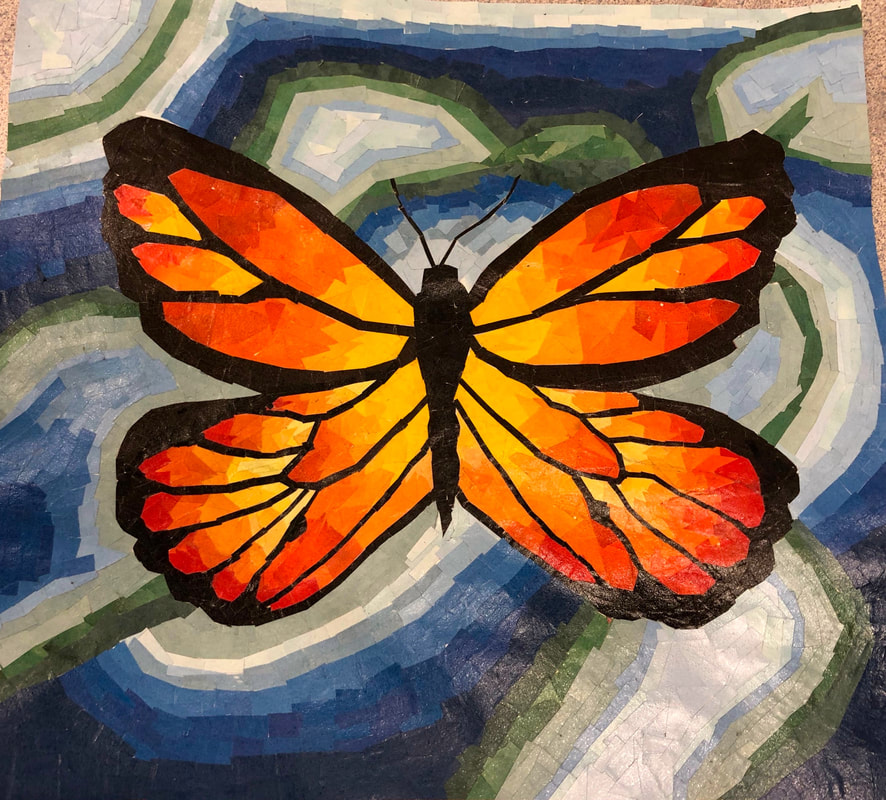
Alexa Smith - JCHS Student
1. Generating Ideas
Mosaic is the art of creating images with an assemblage of small pieces of colored glass, stone, or other materials. It is a technique of decorative art or interior decoration. Many mosaics are made out of glass or tiles using grout in-between pieces. You will use magazine pieces cut into small squares, rectangles or circles and glued onto paper to create a picture. Begin by brainstorming ideas about the image you want to use. List 5 to 7 ideas. Consider landscapes, seascapes, people, animals, objects, etc.
History of Mosaics
Throughout history these beautiful mosaics have been used as part of interior design and have also served as mediums for cultural and spiritual artwork.
Ancient Greeks used mosaics to depict mythological subjects and scenes. The Romans are thought to have adopted the art of mosaics from the Greeks, creating beautiful mosaic artwork to adorn the floors and ceilings of wealthy homes and religious institutions. Mosaic art spread through the rest of Europe, Asia and eventually to the rest of the world.
To create mosaics, artists would cut stone, glass or marble into tiny pieces called “tesserae” and then assemble them into beautiful designs. The smaller the tesserae, the more intricate the design could be.
While there are amazing, historic mosaics all over the world, you don’t necessarily have to travel too far from home to enjoy this style of art. The Cathedral Basilica Saint Louis in Saint Louis, Missouri is home to the world’s largest collection of mosaic art with over 41 million glass pieces installed. Seven thousand colors appear in the glass and the collection covers more than 83,000 square feet of the cathedral. The American Museum of Natural History in New York is known for displaying great modern examples of mosaic artwork.
http://www.mindware.com/blog/index.php/the-history-of-mosaic-art/#.Vi97m4SppFI
2. Research
Go online and look at some ancient and modern examples of mosaics. There is a list of websites below to get you started or you can do your own Google search. After researching mosaics, find 5 images of mosaics you like and place them on a pages document. Study your 3 choices for common elements.
- Study your choices. Name the top 3 most commonly found colors in your choices in order of " appearance.
- What is your favorite pattern? Why?
- Is there an element that shows up in a lot of your design choices (a shape, design, etc.)? What is it " and can you think of way to incorporate that element into your final design?
As you make decisions for your final project, consider what drew you to these images as inspiration for your final design. Save your page as a PDF and turn in into Schoology.
Website References
Unusual Mosaics
http://goo.gl/L7ejCj
http://schimmelart.com/collection.htm
Student Paper Mosaic examples
http://www.ebps.net/Page/2081
Other Mosaics (Real or Paper)
http://www.showcasemosaics.com/bathroom-tile.html
http://mosaicartsource.wordpress.com
https://www.etsy.com/shop/MoniqueSarfityMosaic?ref=l2-shop-info-name
https://www.etsy.com/uk/shop/LAMosaicGifts?ref=l2-shopheader-name
http://www.upcyclemagazine.com/mosaic-made-from-upcycled-junk-mail
http://9bytz.com/famous-works-from-magazines/
3. Visual Development
Create a Mini Mosaic using a 6" square to mimic the image below. Try to match colors and shapes leaving space to represent the route lines. Take a photo of your test pattern and turn it into Canvas
Video Instruction
Watch all of the videos below. Each video has something different to contribute that will help you with your final product.
Video - 1 Color and Texture
The video below talks about how to collect colors and textures for your piece. At the end the artist uses torn paper without grout lines. The same color and texture collections can be applied when using grout and cutting shapes.
Video - 2 Basics of a Paper Mosaic
This video shows a basic paper mosaic. The artist begins with an outline then adds her paper squares. This project shows grouted and cut, but can be applied to a non-grouted and/or torn paper process. Also. note that some of the pieces in this project are larger than what you will be doing and the overall design is a little simplistic.
This video shows a basic paper mosaic. The artist begins with an outline then adds her paper squares. This project shows grouted and cut, but can be applied to a non-grouted and/or torn paper process. Also. note that some of the pieces in this project are larger than what you will be doing and the overall design is a little simplistic.
Video 3 - A quick demonstration of a paper mâché flamingo.
Alternate Project Idea - 3-D Paper Mosaic
You may chose an alternative to the traditional paper mosaic art piece. A demonstration is available on the video below. Check the video out before you decide on how you want to complete your final project.
You may chose an alternative to the traditional paper mosaic art piece. A demonstration is available on the video below. Check the video out before you decide on how you want to complete your final project.
Choosing and Editing Images
After looking at the examples of both real and paper mosaics, choose several images that you may want to use for the final mosaic. To help with the design use a free online photo editor like iPiccy or Picmonkey. Play around until you find something that will make a good mosaic. These sites allow you to use different filters to create a simplified or stylized version of your image. A great filter to use is posterize (see example below). Designs can be added on your final paper to break up large areas of solid color. Notice in real mosaics there is often a patterned rather than a solid background. These patterns are usually monochromatic meaning that they are dark and light versions of a single color. Also think in terms of light, middle and dark values when designing individual images within your main image to create a more 3-deminsional look. For example, on a person's face the top of the cheek has a highlight, the side of the cheek is a mid-tone, and under the chin has a shadow. You will also need to decide if you paper pieces will overlap or if you will leave a small gap to mimic grout lines. Paper can be cut or torn for different effects. Mosaic pieces are often squares or rectangles, but other shapes (like hole punched colors) can be used as well. Once you have made all of your decisions you may begin to work on your final product.
After looking at the examples of both real and paper mosaics, choose several images that you may want to use for the final mosaic. To help with the design use a free online photo editor like iPiccy or Picmonkey. Play around until you find something that will make a good mosaic. These sites allow you to use different filters to create a simplified or stylized version of your image. A great filter to use is posterize (see example below). Designs can be added on your final paper to break up large areas of solid color. Notice in real mosaics there is often a patterned rather than a solid background. These patterns are usually monochromatic meaning that they are dark and light versions of a single color. Also think in terms of light, middle and dark values when designing individual images within your main image to create a more 3-deminsional look. For example, on a person's face the top of the cheek has a highlight, the side of the cheek is a mid-tone, and under the chin has a shadow. You will also need to decide if you paper pieces will overlap or if you will leave a small gap to mimic grout lines. Paper can be cut or torn for different effects. Mosaic pieces are often squares or rectangles, but other shapes (like hole punched colors) can be used as well. Once you have made all of your decisions you may begin to work on your final product.
4. Final Design
*. Shapes - square, rectangle hole punched, triangles, organic, etc.
*. Glue Stick
*. Modge Podge
8. A clear coat can be added over top of your piece when it is finished to add a glossy covering. See me for clear coat
options based on the material you used in your piece.
Other Tile Materials
Anything flat and thin can be used to create or add to your mosaic. Below are some additional ideas.
5. Refinement
Clean up any messy areas. Re-glue areas that are loose. Put your name on the back
- Decide the subject of your mosaic (landscape, seascape, underwater, animal, nature, truck/car, etc)
- Choose the size of your paper (Square 12” x 12” or rectangle 11” x 14”)
- Decide if you are going to leave grout lines or overlap shapes.
- Choose your tile style
*. Shapes - square, rectangle hole punched, triangles, organic, etc.
- Based on your subject begin finding colors in magazines. Cut and separate squares into sections based on colors. Limit colors, fade light to dark, use complementary colors, colors do not need to be natural.
- Squares no larger than a 1/2”. Gather more than you might need.
- Lightly draw you your subject on paper.
- Glue down pieces neatly. We have a variety of glue available for your project. Chose one that works best with your material
*. Glue Stick
*. Modge Podge
8. A clear coat can be added over top of your piece when it is finished to add a glossy covering. See me for clear coat
options based on the material you used in your piece.
Other Tile Materials
Anything flat and thin can be used to create or add to your mosaic. Below are some additional ideas.
- Construction paper scraps
- Candy wrappers
- Old cardboard containers (cereal boxes, can drink cartons, etc.)
- Collected objects (used gift cards, buttons, ribbon, junk mail, flyers/ads, etc.)
- Fabric
5. Refinement
Clean up any messy areas. Re-glue areas that are loose. Put your name on the back
