Illuminated Letter
Finished Artwork
Take a photo of your finished work, and turn it in to Canvas
Take a photo of your finished work, and turn it in to Canvas
http://www.canberracalligraphysociety.org.au/illuminated-letters.html
|
http://img01.deviantart.net/72f4/i/2011/295/f/b/majestic_splendour_30x40inch_by_astrid_1-d2atyqf.jpg
|
https://i.pinimg.com/originals/55/f8/06/55f8063ef48742274d5c08b43d97fcaf.jpg
|
THE BOOK OF KELLS - Project Inspiration
http://historymedren.about.com/od/bookofkell1/p/book_of_kells.htm
The Book of Kells is a stunningly beautiful manuscript containing the Four Gospels. It is Ireland's most precious medieval artifact, and is generally considered the finest surviving illuminated manuscript to have been produced in medieval Europe.
Origins and HistoryThe Book of Kells was probably produced in a monastery on the Isle of Iona, Scotland, to honor Saint Columba in the early 8th century. After a Viking raid the book was moved to Kells, Ireland, sometime in the 9th century.
It was stolen in the 11th century, at which time its cover was torn off and it was thrown into a ditch. The cover, which most likely included gold and gems, has never been found, and the book suffered some water damage; but otherwise it is extraordinarily well-preserved.
In 1541, at the height of the English Reformation, the book was taken by the Roman Catholic Church for safekeeping. It was returned to Ireland in the 17th century, and Archbishop James Ussher gave it to Trinity College, Dublin, where it resides today.
ConstructionThe Book of Kells was written on vellum (calfskin), which was time-consuming to prepare properly but made for an excellent, smooth writing surface.
680 individual pages (340 folios) have survived, and of them only two lack any form of artistic ornamentation. In addition to incidental character illuminations, there are entire pages that are primarily decoration, including portrait pages, "carpet" pages and partially decorated pages with only a line or so of text.
As many as ten different colors were used in the illuminations, some of them rare and expensive dyes that had to be imported from the continent.
The workmanship is so fine that some of the details can only be clearly seen with a magnifying glass.
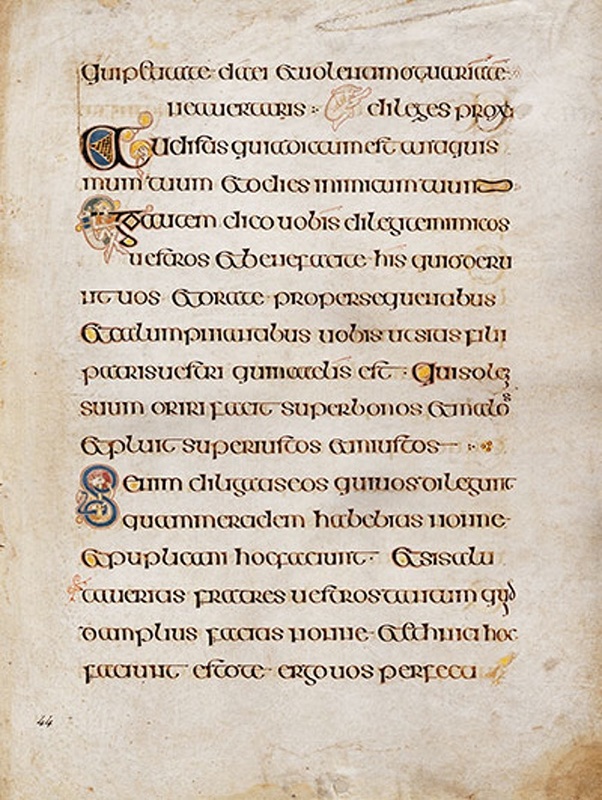
The first or initial letter of certain sentences where highly decorated.
http://www.theguardian.com/books/gallery/2012/dec/14/book-kells-pictures
|
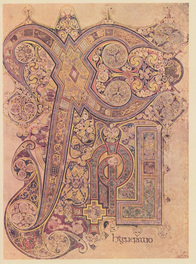
The letters created using highly complex designs, images, and multiple colors.
https://thothistheibis.wordpress.com/tag/book-of-kells/
|
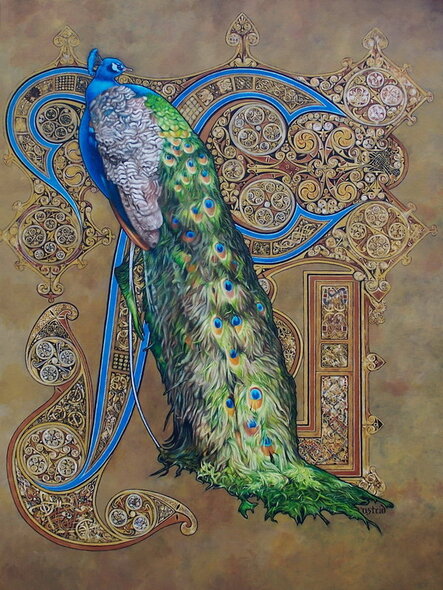
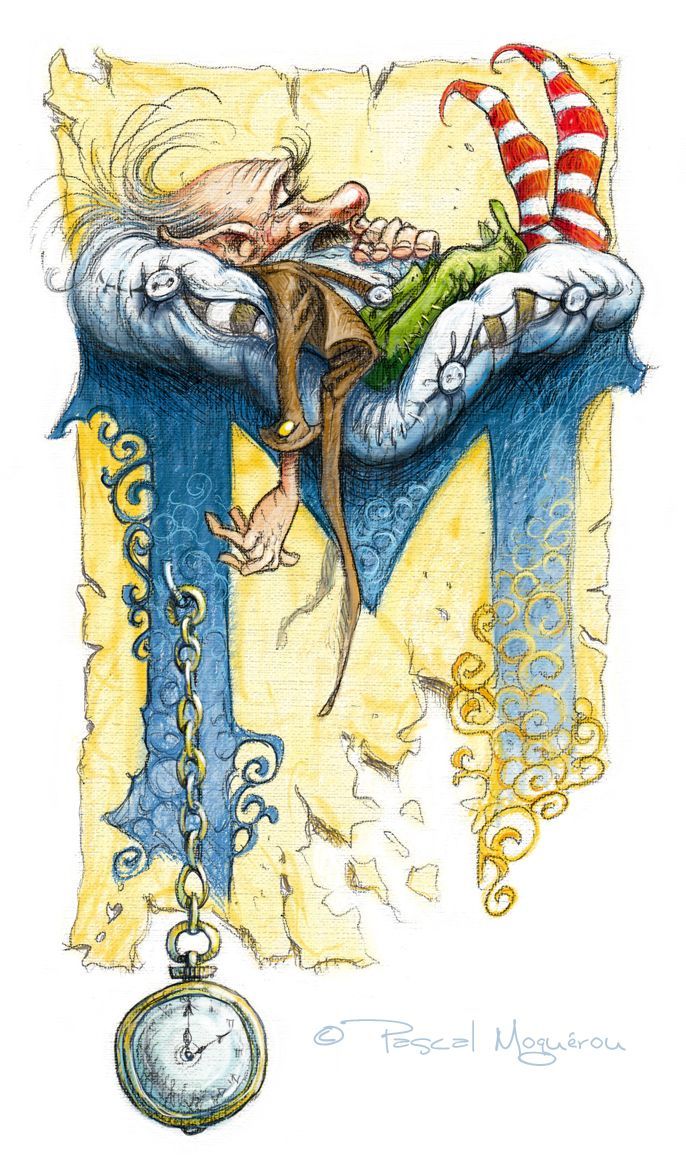
Modern Examples of Illuminated Letters
http://www.mtcalligraphy.com/illuminated_letters.html
http://www.mtcalligraphy.com/illuminated_letters.html
Sketchbook Work
In your sketchbook, title a blank page Illuminated Letter. You will be taking notes and adding some preliminary sketches in your sketchbook for this assignment. It may take more than one page so allow space for several pages in a row just in case you need it.
Press (Use Chrome if it won't open in Safari)
Watch the Prezi by clicking on the link below
Illuminated Letters
Answer the following questions from the Prezi in your sketchbook. Please write both the question and answer since this information may appear on the final exam.
Terms
Please copy the word and definition in your sketchbook.
Elements and Principles Emphasized
Asymmetrical Balance
Line
Color
Pattern
Repetition
Research
Research is the first step in creating a great design. Some key words for your own online search are illuminated letters, initial letter designs, ornamentation, borders, line art, historiated initial, and illuminated manuscripts.
Font Websites
Font River
Design Your Way
My Fonts
1001 Fonts
Medieval Fonts on Font Space
Illuminated Letters Font Examples
Drawing/Design Ideas
How to Draw Celtic Knots
Animal Line Drawings
Ornamentation
Images of Original Illuminations
Images of Original Illuminated Pages
Getty Images of Illuminated Manuscripts
Generating Ideas
Brainstorm ideas about your font style, ornamentation, borders, and images. You may have already gotten some ideas from your research. Remember your first idea is not always the best idea. Include it in your practice, but also explore other designs. Don't fall into the trap of only trying one idea. Even if you choose to follow through with your first idea for your final project, be willing to change to another idea if your find the design unsuccessful.
Sketchbook Assignment
The following steps should be completed in your sketchbook on the pages you set aside for illumination.
Turn in a photo of your sketchbook pages on Canvas.
Illuminated Letter Line Drawings
In your sketchbook, title a blank page Illuminated Letter. You will be taking notes and adding some preliminary sketches in your sketchbook for this assignment. It may take more than one page so allow space for several pages in a row just in case you need it.
Press (Use Chrome if it won't open in Safari)
Watch the Prezi by clicking on the link below
Illuminated Letters
Answer the following questions from the Prezi in your sketchbook. Please write both the question and answer since this information may appear on the final exam.
- What is an illumination?
- What does the term "illuminate" mean?
- Where would you find an illuminated letter if you were looking at a page of text?
- What kinds of images might you find in an illuminated letter?
- In what two countries did the illuminated manuscript rise to popularity during the 7th century?
- What was the job of the Parchmenter?
- What did a Scribe do?
- What work was assigned to the Illuminator?
Terms
Please copy the word and definition in your sketchbook.
- Typography - is the art and technique of arranging type to make written language legible, readable, and appealing when displayed.
- Illuminated Letters - letters that are decorated
- Stylize - to simplify an object to its most basic parts
- Illuminated Manuscript - is a manuscript in which the text is supplemented with such decoration as initials, borders (marginalia) and miniature illustration
- Historiated Initial - is an enlarged letter at the beginning of a paragraph or other section of text, which contains a picture
Elements and Principles Emphasized
Asymmetrical Balance
Line
Color
Pattern
Repetition
Research
Research is the first step in creating a great design. Some key words for your own online search are illuminated letters, initial letter designs, ornamentation, borders, line art, historiated initial, and illuminated manuscripts.
Font Websites
Font River
Design Your Way
My Fonts
1001 Fonts
Medieval Fonts on Font Space
Illuminated Letters Font Examples
Drawing/Design Ideas
How to Draw Celtic Knots
Animal Line Drawings
Ornamentation
Images of Original Illuminations
Images of Original Illuminated Pages
Getty Images of Illuminated Manuscripts
Generating Ideas
Brainstorm ideas about your font style, ornamentation, borders, and images. You may have already gotten some ideas from your research. Remember your first idea is not always the best idea. Include it in your practice, but also explore other designs. Don't fall into the trap of only trying one idea. Even if you choose to follow through with your first idea for your final project, be willing to change to another idea if your find the design unsuccessful.
Sketchbook Assignment
The following steps should be completed in your sketchbook on the pages you set aside for illumination.
- Draw 3 vertical rectangles approximately 1 1/2" x 2". In each box, draw a different font style. The letter should be in outline form and open in the center. It should not be just a line drawing. Circle the one that you like the best.
- Below the 3 boxes draw 3 different border or ornamentation designs. Circle your favorite.
Turn in a photo of your sketchbook pages on Canvas.
Illuminated Letter Line Drawings
Visual Development
You have several options available for your final design. Your design should be medium in complexity. Avoid overly complex designs, but make sure you have enough details so that the letter isn't too simple.
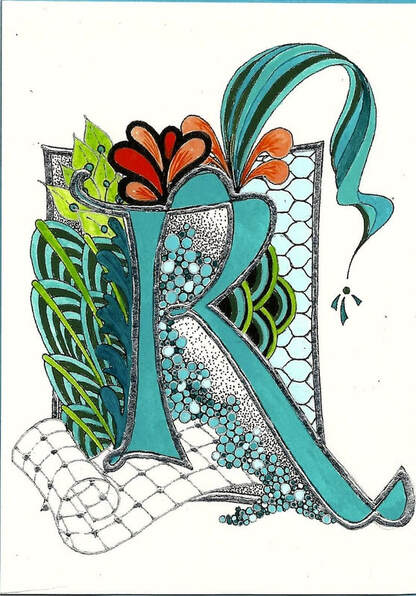
Option 1 - Zentangle Letter
The picture at the top of this page is an example of a Zentangle Initial Letter. Traditional Zentangles are very different from regular drawing. They are a form of artistic meditation that even non-artistic people can do. The Zentangle process is just as important as the final product. Zentangles require focus on the actual design.
For this project you will put Zentangle patterns inside your letter. To find links to Zentangle patterns and other examples, check out the Zentangle Weebly page under the Gap Project tab. The Zentangle patterns will be outlined and filled in using a black Sharpie marker.
Once your pattern is drawn, you will be using water color paints around the outside of the letter.
Option 2 - Traditional Letter
The second options is to create a traditional illuminated letter. This includes drawing patterns, images, and possibly a border. This design will also be painted with water color and then outlined with Sharpie marker. Since the watercolor painting technique doesn't include white paint, plan on leaving white areas unpainted.
Design Layout
You may create a rough draft on a piece a newsprint before you transfer it to the final paper or just draw on your final paper. Your design will be based on your research and practice, but doesn't have to be one of your 3 preliminary sketches.. Your letter will be drawn to scale with all of the details added to the design. Borders can be used for both option 1 or option 2. If you chose to draw a rough draft on a transfer paper, you do not need to worry about messing up and erasing on the final paper. Erasing can cause the watercolor paint not to flow well, and pencil lines and smudges can be seen through the paint.
Remember . . .
Final Design
Steps
You have several options available for your final design. Your design should be medium in complexity. Avoid overly complex designs, but make sure you have enough details so that the letter isn't too simple.
Option 1 - Zentangle Letter
The picture at the top of this page is an example of a Zentangle Initial Letter. Traditional Zentangles are very different from regular drawing. They are a form of artistic meditation that even non-artistic people can do. The Zentangle process is just as important as the final product. Zentangles require focus on the actual design.
For this project you will put Zentangle patterns inside your letter. To find links to Zentangle patterns and other examples, check out the Zentangle Weebly page under the Gap Project tab. The Zentangle patterns will be outlined and filled in using a black Sharpie marker.
Once your pattern is drawn, you will be using water color paints around the outside of the letter.
Option 2 - Traditional Letter
The second options is to create a traditional illuminated letter. This includes drawing patterns, images, and possibly a border. This design will also be painted with water color and then outlined with Sharpie marker. Since the watercolor painting technique doesn't include white paint, plan on leaving white areas unpainted.
Design Layout
You may create a rough draft on a piece a newsprint before you transfer it to the final paper or just draw on your final paper. Your design will be based on your research and practice, but doesn't have to be one of your 3 preliminary sketches.. Your letter will be drawn to scale with all of the details added to the design. Borders can be used for both option 1 or option 2. If you chose to draw a rough draft on a transfer paper, you do not need to worry about messing up and erasing on the final paper. Erasing can cause the watercolor paint not to flow well, and pencil lines and smudges can be seen through the paint.
Remember . . .
- All letters are shapes, not lines.
- Decorate behind the letter.
- Decorate inside the letter.
- Decorate around the letter.
- Decorate using pattern and texture.
- Decorate using foliage.
- Inhabit the letter (birds, animals, people, etc. “live” in the versal box.)
- Historiate - illuminate inside the letter (ie. “O” for “once upon a time” with a picture of a glass slipper inside the “O”.)
- Fantasy figures can be used.
Final Design
Steps
- Using a light box, place your newsprint drawing under your final paper if you created a rough draft.
- Lightly trace all of your lines
- Begin painting following the guidelines for water color paint.
- Once everything is painted and dry, outline your letter with a Sharpie marker. (Black is recommended but not required)
- Sign your name in the bottom right corner
